Where to Plug in Jumper Cables for a Dead Car Battery
Knowing where to plug in jumper cables can save you from a frustrating roadside breakdown. This guide walks you through the exact steps to connect jumper cables safely to a dead car battery. You will learn which terminals to use, the correct order to attach cables, and common mistakes to avoid. Whether you are a beginner or just need a quick refresher, this guide covers everything you need to know about jump starting your vehicle the right way.
There is nothing worse than turning the key and hearing nothing but a clicking sound. Your car battery is dead, and you are stuck. The good news is that a jump start can bring your vehicle back to life in minutes. But here is the thing many people get wrong. They do not know where to plug in jumper cables. Connecting them incorrectly can damage your electrical system, fry sensitive electronics, or even cause a dangerous spark. This guide will show you exactly how to do it right, every single time.
Whether you are stranded in a parking lot or dealing with a dead battery on a cold morning, understanding the correct battery terminals and cable order is essential. This article covers everything from basic battery maintenance tips to step-by-step instructions you can follow even if you have never done this before. Let us get into it.
Key Takeaways
- Red Clamp Goes to Positive: Always connect the red clamp to the positive (+) battery terminal first.
- Black Clamp Goes to Negative or Ground: The black clamp connects to the negative (-) terminal or a metal ground point on the dead car.
- Order Matters: Connecting cables in the wrong order can damage your electrical system or cause sparks.
- Safety Comes First: Wear gloves, ensure both vehicles are off, and keep cables away from moving parts.
- Know Your Battery Terminals: Corroded or hidden terminals can make the process harder, so inspect before you start.
- Portable Jump Starters Are an Alternative: These devices eliminate the need for a second vehicle entirely.
📑 Table of Contents
- Understanding Your Car Battery Terminals
- What You Need Before You Start
- Where to Plug in Jumper Cables: Step-by-Step Guide
- Common Mistakes When Connecting Jumper Cables
- Safety Precautions You Should Never Skip
- Alternatives to Traditional Jumper Cables
- What to Do After a Successful Jump Start
- Comparison: Jumper Cables vs. Portable Jump Starters
- Expert Insights on Battery Health and Jump Starting
- Quick Tips for Remembering the Connection Order
- When to Call for Professional Help
- Conclusion
Understanding Your Car Battery Terminals
Before you touch any cables, you need to understand what you are working with. Every vehicle battery has two terminals. These are the connection points where battery cables attach. Knowing which is which is the first step in learning where to plug in jumper cables.
The Positive Terminal
The positive terminal is marked with a plus sign (+). It is usually colored red. The red clamp on your jumper cables connects here. This terminal sends power out to the car engine and all the electrical components in your vehicle. If you are unsure which terminal is positive, look for the + symbol on the battery case. Some batteries also have a red cover over the positive post.
The Negative Terminal
The negative terminal is marked with a minus sign (-). It is usually colored black. The black clamp connects here. This terminal serves as the ground connection. It completes the electrical circuit that allows power to flow through your vehicle. In some cases, you may connect the black clamp to a metal ground point on the car frame instead of the terminal itself. We will cover that in detail later.
Identifying Terminals When They Are Hard to See
Sometimes the terminals are hidden under a plastic cover. Other times, they may be corroded with a white or greenish buildup. Corroded terminals can make it difficult to see the + and – markings. Use a cloth to wipe away any visible corrosion before you attempt a jump start. If the cover is removable, take it off gently. You can also refer to your vehicle owner’s manual for a diagram of the battery location and terminal layout.
What You Need Before You Start
Jump-starting a car is simple, but you need the right tools and a little preparation. Gathering everything beforehand saves time and prevents mistakes.
- A set of jumper cables — Make sure they are long enough to reach between two vehicles. Standard cables are usually 10 to 20 feet long.
- A running vehicle — The donor car needs a healthy car battery with enough charge to share.
- Safety gloves and goggles — Batteries produce small amounts of hydrogen gas. Sparks can be dangerous.
- Your vehicle owner’s manual — Some cars have specific instructions for jump starting or prefer the ground connection on a different point.
- A clean cloth — Useful for wiping terminals before connecting cables.
Pro tip: If you do not have jumper cables, consider keeping a portable jump starter in your trunk. These compact devices act as a mini battery and can start your car without needing a second vehicle. They are a great addition to any roadside emergency kit.
Where to Plug in Jumper Cables: Step-by-Step Guide
This is the core of the article. Follow these steps exactly to safely jump start your vehicle. The order in which you connect the cables matters a lot.
Step 1: Park Both Vehicles Safely
Position the donor car close to the car with the dead battery. The vehicles should be nose-to-nose or side-by-side, close enough for the cables to reach both batteries. Turn off the ignition on both cars. Engage the parking brakes on both vehicles. This prevents any unexpected movement during the process.
Step 2: Locate the Battery Terminals
Open the hood of both cars. Find the battery terminals on the dead car first. Identify the positive (+) and negative (-) posts. Then locate the same terminals on the donor car. If either battery has a protective cover, remove it carefully.
Step 3: Connect the Red Clamp to the Dead Battery’s Positive Terminal
This is the first cable you attach. Take the red clamp and connect it to the positive terminal of the dead battery. Make sure the clamp grips the metal post firmly. You should feel a slight click or snug fit. This connection carries the positive current from the donor battery to the dead battery.
Step 4: Connect the Other Red Clamp to the Donor Battery’s Positive Terminal
Now take the other red clamp and connect it to the positive terminal of the donor car’s battery. Again, ensure a secure fit. At this point, both red clamps are connected. Do not let the clamps touch each other or any metal surface on the car.
Step 5: Connect the Black Clamp to the Donor Battery’s Negative Terminal
Take the black clamp and connect it to the negative terminal of the donor car’s battery. This is the second-to-last connection. Keep the final black clamp for last because it is the one most likely to spark.
Step 6: Connect the Remaining Black Clamp to a Ground Point on the Dead Car
Here is a critical safety step. Instead of connecting the last black clamp directly to the dead battery’s negative terminal, attach it to a metal ground point on the dead car. This can be a bare metal bolt, a bracket, or any unpainted metal surface on the engine block or frame. This reduces the risk of sparks near the battery, where hydrogen gas could ignite.
Step 7: Start the Donor Car First, Then the Dead Car
Start the engine of the donor car and let it idle for a few minutes. This allows the electrical system to send a charge to the dead battery. Then try starting the car with the dead battery. If it does not start right away, wait another minute or two and try again. Do not attempt to start it more than three or four times in a row, as this can overheat the starter motor.
Step 8: Disconnect the Cables in Reverse Order
Once the dead car is running, carefully remove the cables in the opposite order of how you connected them:
- Remove the black clamp from the ground point on the dead car.
- Remove the black clamp from the donor battery’s negative terminal.
- Remove the red clamp from the donor battery’s positive terminal.
- Remove the red clamp from the dead battery’s positive terminal.
Never let the clamps touch each other while any part of the cables is still connected to a battery.
Common Mistakes When Connecting Jumper Cables
Even with good intentions, people make mistakes. Here are the most common errors and how to avoid them.
Connecting Cables in the Wrong Order
The order matters more than most people realize. Connecting the black clamp to the dead battery’s negative terminal first can create sparks right next to the battery. Always follow the red-to-dead, red-to-donor, black-to-donor, black-to-ground sequence.
Mixing Up Positive and Negative
Connecting the red clamp to the negative terminal and the black clamp to the positive terminal is a serious mistake. This reverse polarity can fry your electrical system, damage the alternator, and destroy sensitive electronics like your radio, sensors, and computer modules. If you make this mistake, do not start either car. Disconnect everything immediately and start over.
Letting Clamps Touch Each Other
When cables are connected to a battery, the exposed metal clamps can create a short circuit if they touch. Keep them separated at all times during the connection process.
Ignoring Corroded or Damaged Cables
Old or frayed battery cables may not conduct electricity properly. Inspect your cables before using them. If the rubber insulation is cracked or the metal clamps are worn, replace them before attempting a jump start.
Safety Precautions You Should Never Skip
A jump start is generally safe when done correctly, but batteries can be unpredictable. Follow these precautions to protect yourself and your vehicle.
- Never smoke near a battery or jumper cables.
- Wear protective gloves and safety glasses to guard against acid splashes or sparks.
- Check for cracked battery cases. A damaged battery can leak acid or even explode.
- Do not attempt a jump start if the battery is frozen. Frozen batteries can rupture when charged.
- Keep children and pets away from both vehicles during the process.
- Read your owner’s manual for any manufacturer-specific warnings about jump starting.
If you are ever unsure or uncomfortable, call roadside assistance. There is no shame in asking for help, and professionals have the tools and experience to handle any situation safely.
Alternatives to Traditional Jumper Cables
Not everyone has jumper cables on hand, and not everyone has a second vehicle nearby. Fortunately, there are alternatives.
Portable Jump Starters
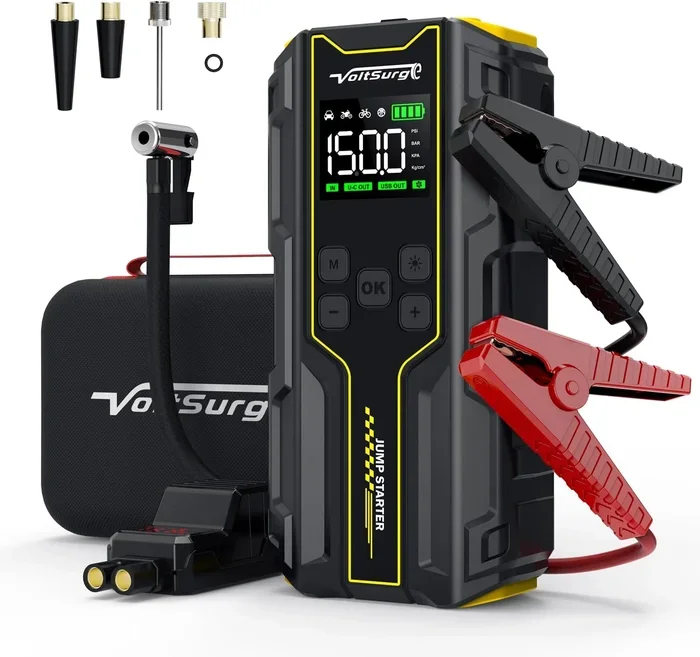
A portable jump starter is a compact battery pack you keep in your trunk. It connects directly to your battery and provides enough power to start your car. These devices are small enough to fit in a glove box and are perfect for solo drivers. They eliminate the need to find another vehicle and figure out where to plug in jumper cables.
Battery Chargers
If you have access to a power outlet, a battery charger can slowly recharge a dead car battery over several hours. This is a great option if you are parked at home or at a campsite. It is slower than a jump start but gentler on the battery.
Push Starting (Manual Transmission Only)
If you drive a manual transmission car, you can push start it by having someone push the vehicle while you release the clutch in second gear. This method does not require cables or another battery. However, it only works for manual vehicles and is not recommended for modern cars with electronic fuel injection in some cases.
What to Do After a Successful Jump Start
Once your car is running again, you are not quite out of the woods. Here is what you should do next.
- Let the engine run for at least 15 to 20 minutes. This allows the alternator to recharge the battery.
- Avoid turning off the car immediately. If the battery was deeply discharged, it may not hold enough charge to restart the engine right away.
- Get your battery tested. Visit an auto parts store or mechanic to check the battery’s health. Many stores offer free battery testing.
- Consider replacing an old battery. If your battery is more than three to five years old, a dead battery may be a sign it is time for a new one.
- Practice good battery maintenance. Keep terminals clean, ensure cables are tight, and avoid leaving lights or accessories on when the engine is off.
Taking these steps after a jump start can extend the life of your battery and prevent you from being stranded again.
Comparison: Jumper Cables vs. Portable Jump Starters
Not sure which option is right for you? Here is a quick comparison.
| Feature | Jumper Cables | Portable Jump Starter |
|---|---|---|
| Requires a second vehicle | Yes | No |
| Cost | $20 to $60 | $40 to $150 |
| Portability | Bulky, needs storage | Compact, fits in trunk |
| Ease of use | Requires two people | One person can use it |
| Rechargeable | No | Yes, via USB or charger |
| Works anywhere | Only with another vehicle | Yes, standalone |
Both options have their place. Jumper cables are great if you frequently drive with a partner or in areas where people stop to help. A portable jump starter is ideal for solo drivers or anyone who wants a reliable, independent solution for dead battery emergencies.
Expert Insights on Battery Health and Jump Starting
Automotive experts agree that understanding your vehicle battery is one of the most overlooked aspects of car ownership. A dead battery is the number one reason for roadside calls worldwide. Regular maintenance, such as cleaning terminals and testing voltage, can prevent most dead battery situations.
Mechanics also recommend keeping your engine running for at least 20 minutes after a jump start to ensure the alternator fully recharges the battery. If you find yourself needing a jump start frequently, your battery may be failing or your alternator may not be charging properly. In either case, a professional inspection is well worth the cost.
Another expert tip: always keep your cables organized and stored in a cool, dry place. Heat and moisture accelerate cable degradation. Well-maintained cables make the process of where to plug in jumper cables faster and safer when you need them most.
Quick Tips for Remembering the Connection Order
It is easy to forget the order under stress. Here is a simple trick to remember:
- Red to Dead — Connect the red clamp to the dead battery’s positive terminal first.
- Red to Donor — Connect the other red clamp to the donor battery’s positive terminal.
- Black to Donor — Connect the black clamp to the donor battery’s negative terminal.
- Black to Ground — Connect the last black clamp to a metal ground point on the dead car.
Think of it as Red-Dead, Red-Donor, Black-Donor, Black-Ground. This simple mnemonic can save you from a costly mistake.
When to Call for Professional Help
There are times when a jump start is not the right solution. Call a professional if:
- The battery is visibly damaged or leaking.
- The car has been dead for more than a few days and will not hold a charge.
- You smell sulfur or rotten eggs near the battery.
- The electrical system shows signs of damage, such as flickering lights or non-functioning dashboard displays.
- You feel uncertain about any step in the process.
There is no shame in calling for help. Roadside assistance services are widely available and can get you back on the road safely. Knowing where to plug in jumper cables is a valuable skill, but safety always comes first.
Conclusion
Knowing where to plug in jumper cables is one of the most useful skills you can have as a driver. It saves time, money, and the stress of being stranded with a dead battery. By following the correct order — red to positive, black to ground — you protect your vehicle and yourself. Remember to always prioritize safety, inspect your equipment, and never hesitate to call for help if something does not feel right.
Keep this guide saved on your phone or bookmarked for quick access the next time you need it. A little preparation goes a long way when you are dealing with a dead car battery on the side of the road.
Frequently Asked Questions
Can I jump start my car without another vehicle?
Yes, you can use a portable jump starter. These compact devices act as a built-in battery and eliminate the need for a second vehicle. They are affordable and easy to store in your trunk.
What happens if I connect the jumper cables in the wrong order?
Connecting cables in the wrong order can cause sparks, damage your electrical system, or blow fuses. If you make a mistake, disconnect everything immediately and start over in the correct sequence.
How long should I let the donor car run after a jump start?
Let the donor car run for at least 5 minutes before trying to start the dead car. Once the dead car is running, let it idle for 15 to 20 minutes to allow the alternator to recharge the battery.
Can a completely dead battery be recharged with jumper cables?
Yes, but only partially. Jumper cables provide a temporary boost. The alternator will continue charging the battery while the engine runs. If the battery is old or deeply discharged, it may not hold a charge and need replacement.
Is it safe to jump start a car in the rain?
It is generally safe if you take proper precautions. Keep the cables and batteries as dry as possible. Avoid standing in standing water. If conditions feel unsafe, wait for better weather or call roadside assistance.
How often should I replace my car battery?
Most vehicle batteries last between 3 and 5 years. If you find yourself needing frequent jump starts or notice slow cranking, it is time to have your battery tested and likely replaced.
=== META TITLE ===
Where to Plug in Jumper Cables for Dead Battery
=== URL SLUG ===
where-to-plug-in-jumper-cables
=== SEO TITLE ===
Where to Plug in Jumper Cables for a Dead Car Battery