Is It Hard to Draw Cars A Simple Step by Step Guide
Is It Hard to Draw Cars is an essential topic that provides valuable insights.
Key Takeaways
- Understanding Is It Hard to Draw Cars: Provides essential knowledge
📑 Table of Contents
- Why Drawing Cars Seems Hard (And Why It Really Is Not)
- Understanding Car Proportions
- Step by Step Guide to Drawing a Car
- Essential Car Drawing Tools for Beginners
- Practice Exercises to Build Your Skills
- Common Mistakes Beginners Make When Drawing Cars
- Expert Insights on Getting Better at Drawing Cars
- Key Takeaways
- Frequently Asked Questions
- Conclusion
Why Drawing Cars Seems Hard (And Why It Really Is Not)
A lot of people believe car drawing requires years of training. That is a big myth. Cars have shapes just like everything else. Once you understand those shapes, the rest falls into place. The real challenge is not talent. It is knowing the right approach.
The Illusion of Complexity
When you see a professional automotive sketch, it looks flawless. But every expert started with basic lines and shapes. A sports car might look complicated, but it is really just boxes, curves, and circles put together. Breaking it down removes the mystery.
Here is what makes car sketching for beginners easier than you think:
- Cars follow simple geometric forms
- You only need basic tools like a pencil and paper
- Mistakes are easy to fix with an eraser
- Every car shares common structural patterns
Understanding Car Proportions
The biggest secret to great car drawing is nailing the proportions. Proportions are the size relationships between different parts of the car. Get this right, and your sketch instantly looks better.
The Basic Car Shape Framework
Start by thinking of every car as a simple rectangle with rounded edges. Then divide it into zones. The front zone holds the hood and bumper. The middle zone is the cabin or passenger area. The rear zone holds the trunk and back bumper.
Here is a simple way to set up your car drawing proportions:
- Draw a long horizontal rectangle
- Divide it into three equal parts
- Round the front and rear edges
- Add wheel arches at the bottom
This framework works for sedans, SUVs, and even sports cars. Once you master this base shape, you can draw any vehicle. Pencil drawing cars becomes much less stressful when you have a solid structure to build on.
Common Proportion Mistakes to Avoid
Even experienced artists make these errors sometimes:
- Making the hood too long or too short
- Drawing wheels that are different sizes
- Skipping the wheel well cutouts
- Forgetting the ground line beneath the car
Always check your proportions before adding details. A quick squint test helps. Squint at your drawing and see if the basic shape reads clearly. If it does, you are on the right track.
Step by Step Guide to Drawing a Car
This is the core of our guide. Follow these steps in order, and you will be surprised how quickly your skills improve. This simple step by step guide works for almost any car style.
Step 1: Light Sketch the Basic Shape
Start with a very light pencil. Use gentle strokes that are easy to erase. Draw the main body shape using the rectangle framework we covered earlier. Do not press hard. Light lines give you room to adjust.
At this stage, focus only on the outer silhouette. Ignore doors, windows, and small details. Just capture the overall flow of the car outline sketch. Think of it as a silhouette against a wall.
Step 2: Add the Wheel Arches and Wheels
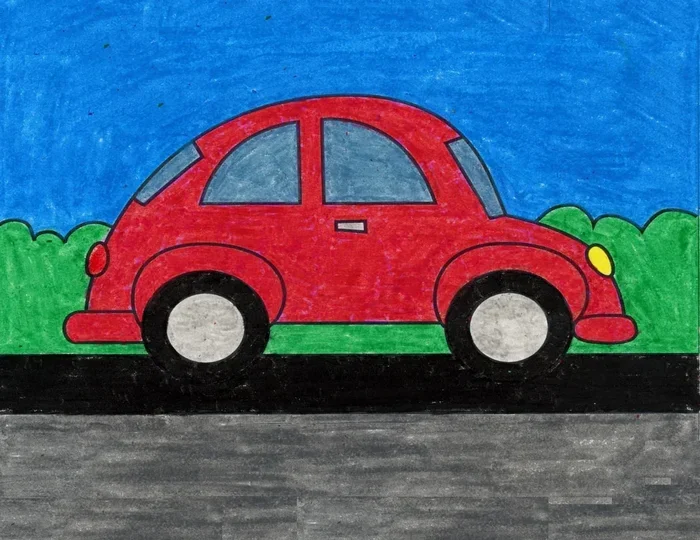
Draw two circles for the wheels inside the wheel arches. Make sure they are evenly spaced and roughly the same size. The wheels should sit on the ground line. This gives your drawing a sense of weight and balance.
Drawing car wheels properly is essential. They anchor the entire vehicle. If the wheels look off, the whole car will feel wrong.
Step 3: Sketch the Windows and Door Lines
Now add the window outlines. Draw a horizontal belt line that runs across the car at the door level. Above this line, sketch the front and rear windows. Below it, draw the doors and any other body panels.
Keep these lines light and loose. You will refine them in the next steps. This is a great stage to practice automotive sketching with confidence.
Step 4: Define the Body Lines and Details
Every car has characteristic body lines. These are the creases and curves that give a car its personality. Sports cars often have a aggressive side line. Sedans tend to have smoother, subtler lines.
Add details like the front grille, headlights, taillights, and bumper shapes. Also include door handles, side mirrors, and any distinctive features. This is where your car drawing starts to look real.
Step 5: Refine and Clean Up Your Lines
Go over your drawing with darker, more confident lines. Erase any unnecessary construction lines from earlier steps. Make sure your edges are clean and your curves are smooth.
Take your time with this step. Clean lines make a huge difference in how professional your car sketch looks. Do not rush. Precision here pays off.
Step 6: Add Shading and Depth
Shading brings your drawing to life. Identify your light source. Then add darker tones on the opposite side of the car. Use hatching or cross-hatching techniques for smooth gradients.
Pay special attention to the wheel wells, undercarriage, and areas around the windows. These shadows add realism. Shading cars properly is what separates a flat sketch from a dynamic drawing.
Essential Car Drawing Tools for Beginners
You do not need expensive gear to start drawing cars. A few basic tools are all you need to get going.
Recommended Starter Kit
- Pencils: A set of HB, 2B, and 4B pencils covers most needs
- Eraser: A kneaded eraser lifts graphite cleanly without smudging
- Paper: Smooth sketch paper works best for clean lines
- Ruler: Helps with straight body lines and proportions
- Blending Stump: Creates smooth shading transitions
Digital vs Traditional Drawing
Some people prefer digital tools for car design sketching. Tablets and styluses offer undo buttons and layers. These are great for experimenting. However, traditional pencil drawing teaches you fundamental skills that transfer to any medium.
Both approaches work well. Start with pencil if you are a total beginner. Switch to digital later if you want to explore automotive art in more depth.
Practice Exercises to Build Your Skills
Like any skill, getting better at car sketching takes regular practice. These exercises will accelerate your progress.
Exercise 1: Draw the Same Car From Different Angles
Pick one car and draw it from the front, side, rear, and three-quarter view. This teaches you how shapes change with perspective. It is one of the best beginner car art exercises you can do.
Exercise 2: Trace Real Car Photos
Find a photo of a car you like. Place a blank sheet over it and lightly trace the major lines. This helps train your eye to see shapes and proportions. After tracing, redraw the car from memory without the photo.
Exercise 3: Draw Cars From Imagination
Once you feel comfortable, try designing your own car. Combine elements from different vehicles. Create a fantasy sports car or a futuristic SUV. This is where car drawing becomes truly fun and personal.
Exercise 4: Speed Sketching
Set a timer for 5 minutes and try to capture a car’s essence as fast as possible. This builds confidence and looseness in your lines. Speed sketches are great warm-ups before longer drawing sessions.
Common Mistakes Beginners Make When Drawing Cars
Knowing what to avoid saves you hours of frustration. Here are the most common pitfalls in car sketching for beginners.
Mistake 1: Starting with Too Much Detail
Many beginners dive straight into drawing tiny details like rivets or grill patterns. This is backwards. Always start with the big shapes. Add details only after the structure is solid.
Mistake 2: Ignoring the Ground Line
Cars sit on the ground. If you forget to draw a ground line, your vehicle will look like it is floating. A simple horizon line anchors the entire drawing and adds realism.
Mistake 3: Drawing Symmetrical Wheels
In real life, the near-side wheel looks different from the far-side wheel because of perspective. Drawing both wheels as identical circles is a telltale sign of a beginner sketch. Pay attention to how wheels overlap and recede.
Mistake 4: Using Too Heavy Lines Too Early
Pressing hard with your pencil early on leaves you no room to fix mistakes. Keep your initial lines light and loose. You can always go over them later with darker strokes.
Expert Insights on Getting Better at Drawing Cars
We asked experienced automotive artists for their top advice on improving car drawing skills. Here is what they shared.
Study Real Cars and Reference Photos
Professional automotive sketching artists spend a lot of time studying real vehicles. Visit car shows, browse car magazines, or save photos of cars you admire. The more you observe real car shapes, the better your drawings will become.
Learn Basic Perspective
Understanding one-point and two-point perspective transforms your car design sketching. Perspective creates the illusion of depth. A car drawn with proper perspective looks three-dimensional and dynamic.
Be Patient With Your Progress
Every artist has bad drawings in their past. The key is to keep practicing. Set aside 15 to 20 minutes daily for pencil drawing cars. Over time, you will see dramatic improvement. Consistency beats perfection every time.
Join a Community of Car Artists
Sharing your work with others builds motivation. Online forums and social media groups focused on automotive art offer feedback, inspiration, and friendly competition. Connecting with fellow enthusiasts keeps you engaged.
Key Takeaways
- It is not hard to draw cars: With basic shapes and a step by step approach, anyone can learn to sketch vehicles effectively.
- Proportions come first: Master the basic car framework before adding details. Proper proportions make or break your sketch.
- Follow the six step process: Light sketch, wheels, windows, details, refinement, and shading. Each step builds on the last.
- Use simple tools: You do not need expensive gear. A pencil, eraser, and sketch paper are all you need to start.
- Avoid common beginner mistakes: Skip the details too early, ignore the ground line, and draw symmetrical wheels are the top errors to watch for.
- Practice regularly: Daily exercises like speed sketching and drawing from memory build skills faster than occasional long sessions.
- Study real cars: Reference photos and observing real vehicles dramatically improve your automotive sketching ability.
Frequently Asked Questions
Is it really possible to learn drawing cars if I have no artistic talent?
Absolutely. Drawing cars is a learned skill, not an innate talent. Most people who draw well simply practiced the right way over time. This guide gives you that right approach. Follow the steps, practice regularly, and you will see real progress within weeks.
What is the best car to start drawing as a beginner?
Start with simple shapes like a sedan or a basic SUV. These vehicles have clean, straightforward lines. Avoid complex sports cars with lots of curves at first. A simple hatchback or family car is perfect for practicing car proportions and basic automotive sketching techniques.
How long does it take to get good at drawing cars?
With consistent practice of 15 to 20 minutes daily, most beginners see noticeable improvement within two to four weeks. Mastery takes longer, but you can create satisfying drawings very early on. The key is to stick with it and not get discouraged by early results.
Do I need to buy expensive drawing supplies to draw cars?
No way. A basic set of pencils, a sketchbook, and a good eraser are all you need to begin car drawing. You can upgrade to digital tools or professional-grade supplies later if you want. The tools do not matter as much as the practice.
Can I learn to draw cars from online tutorials?
Yes. Online tutorials are one of the best ways to learn car sketching. They let you pause, rewind, and practice at your own pace. This guide itself is a form of structured tutorial. Combine it with video lessons for even faster improvement.
What should I do if my car drawings look wrong or distorted?
This is completely normal for beginners. Go back to the basics. Check your car proportions and make sure your wheel sizes match. Use lighter pencil lines so you can fix errors easily. Remember, every artist draws imperfect sketches at first. Keep practicing and your accuracy will improve.
Conclusion
So, is it hard to draw cars? Not anymore. You now have everything you need to start your car drawing journey with confidence. The step by step guide in this article gives you a clear path from your first sketch to polished, realistic drawings.
Remember that every expert was once a beginner. Your early drawings might not look perfect, and that is perfectly fine. Each sketch teaches you something new. Focus on improving a little bit each day rather than expecting overnight mastery.
Grab your pencil, pick a car you love, and start drawing. Use the car sketching tips and exercises from this guide. Share your work with friends or online communities. The more you draw, the better you will get.
Drawing cars is a rewarding hobby that combines creativity, observation, and technical skill. You now understand car proportions, the drawing process, common mistakes to avoid, and how to practice effectively. Put this knowledge into action today. Your first great car drawing is closer than you think.