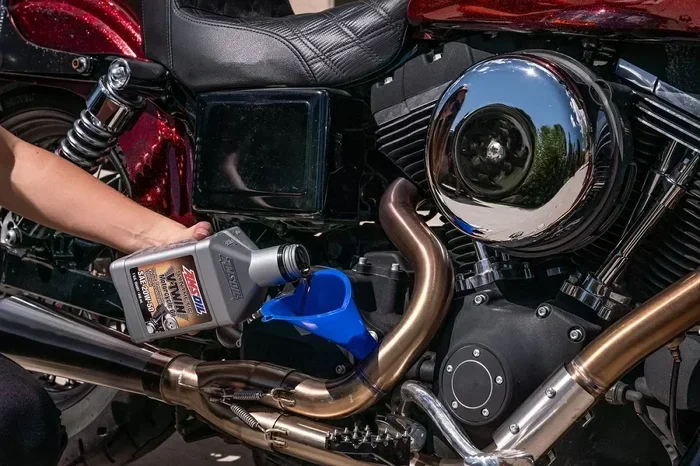
How to Check the Primary Oil on Your Harley-Davidson
Checking the primary oil on your Harley-Davidson is one of the simplest maintenance tasks you can do at home. This guide walks you through everything you need to know, from gathering the right tools to identifying when your oil needs changing. A few minutes of regular care can keep your Harley running strong for thousands of miles.
This is a comprehensive guide about How to Check Primary Oil on Harley-Davidson.
Key Takeaways
- Regular checks matter: Checking your primary oil regularly prevents engine damage and keeps your Harley running smoothly.
- It is easy to do at home: You only need a few basic tools and about 15 minutes.
- Know the right oil type: Using the correct oil weight and brand protects your primary chain case.
- Watch for warning signs: Dark color, burnt smell, or low levels all signal it is time for a change.
- Follow Harley’s recommendations: Stick to the service interval outlined in your owner’s manual for best results.
- Avoid common mistakes: Overfilling and using the wrong oil can cause serious problems.
[FEATURED_IMAGE_PLACEHOLDER]
Why Checking Your Primary Oil Matters
Your Harley-Davidson’s primary oil plays a big role in keeping your bike healthy. It lubricates the primary chain, clutch, and gears inside the primary chain case. Without proper oil levels, these parts wear out fast. Checking your primary oil should be part of every rider’s routine. Think of it like checking the tire pressure on your bike. A quick glance can save you from expensive repairs later.
Many riders forget about primary oil until something goes wrong. The truth is, Harley-Davidson primary oil breaks down over time from heat and use. Old oil loses its ability to protect metal parts. This leads to increased friction, heat, and eventually component failure. A simple check takes seconds and tells you a lot about your bike’s health.
If you have ever wondered how to keep your motorcycle running at its best, this is where it starts. Motorcycle maintenance does not need to be complicated. You do not need a mechanic for every task. Learning to check and maintain your primary oil gives you confidence as a rider. It also saves you money in the long run.
What You Will Need to Check Primary Oil
Before you start, gather everything you need. Having your tools ready makes the process fast and painless. Here is what you will want on hand:
- Clean rags or paper towels for wiping the area around the drain and fill plugs
- The correct Harley-Davidson primary oil for your model year
- A funnel to avoid spills when adding oil
- A torque wrench to properly tighten plugs to factory specs
- Your Harley owner’s manual for oil capacity and spec details
- A level surface to park your bike on
Not sure which oil to use? Always check your owner’s manual first. Harley recommends specific oil weights for different models and riding conditions. Using the wrong oil can affect clutch performance and gear protection. If you are unsure about oil compatibility, it is worth doing a little research before you begin.
You should also make sure your bike is on a flat surface. This ensures you get an accurate reading of the oil level. If you check the oil on a slope, the reading will not be reliable. Park on your center stand or paddock stands if you have them.
Step-by-Step Guide to Checking Primary Oil
Step 1: Let the Engine Warm Up
Start your Harley and let it idle for a few minutes. Warming up the oil makes it flow more freely. This gives you a more accurate level reading. Do not ride the bike hard during this step. A gentle idle is all you need.
While the engine is warm, you can also get a good look at the oil’s color and consistency. Fresh primary oil is usually clear amber. Dark brown or black oil tells you it is time for a change. If the oil looks gritty or smells burnt, do not wait to change it.
Step 2: Locate the Primary Oil Drain Plug
Flip your Harley over or find a way to access the underside of the engine. The primary oil drain plug is located on the left side of the engine. It is part of the primary chain case housing. On most Harley models, you will see it near the middle of the bike, below the engine.
Place a rag underneath the plug before you loosen it. Primary oil can be messy when it drains out. Having your rags ready keeps things clean and prevents oil from getting on your paint or driveway.
Step 3: Drain the Old Oil
Use your socket wrench to loosen the drain plug slowly. Let the old oil drain completely into a pan or container. Wait a few minutes after it stops dripping. This ensures you get as much old oil out as possible.
While the oil is draining, take a moment to inspect the drain plug. Look for metal shavings or debris on the magnet. A small amount of metal is normal. But large flakes or chunks could signal internal wear. If you see a lot of debris, it might be worth taking your bike to a mechanic for a closer inspection.
Step 4: Remove the Fill Plug and Check the Level
Once the oil has stopped draining, move to the fill plug. The fill plug is on the left side of the primary chain case as well, but higher up. Remove the fill plug with your wrench.
Now comes the key part. Using a funnel, pour in the recommended amount of primary oil. Add it slowly and check the level frequently. You want the oil to reach just below the bottom of the fill hole. Overfilling can cause problems, so go slow and steady.
If you want a more precise check, some riders use a dipstick-style tool. However, most Harleys rely on the fill-hole method. Pour oil until you see it reach the bottom of the fill port opening. That is your target level.
Step 5: Replace the Plugs and Clean Up
After reaching the correct level, reinstall the fill plug and tighten it to the torque spec in your manual. Then do the same with the drain plug. Use a clean rag to wipe away any oil drips around the plugs.
Start your engine and let it idle for a minute. This circulates the new oil through the primary chain case. Check underneath for any leaks around the plugs. If you see drips, turn off the engine and tighten the plugs a little more.
How to Know When to Change Primary Oil
Checking your oil regularly helps you spot problems early. But how do you know when it is time for a full change? Here are the signs to watch for:
- Dark or black color: Fresh oil is amber. If it looks dark, it has been broken down by heat and use.
- Burnt smell: A strong burnt odor means the oil is overheated and no longer effective.
- Metal particles: Seeing metal flakes in your oil suggests internal wear that needs attention.
- Low levels after topping off: If you keep losing oil, there may be a leak or burning issue.
- Clutch slipping: Old or wrong oil can cause clutch feel changes. This is a serious red flag.
- Mileage or time interval: Most Harley manuals recommend changing primary oil every 10,000 miles or once a year.
Following the Harley maintenance schedule in your owner’s manual is the best approach. Even if your oil looks fine, time and heat degrade the lubricating properties. Do not skip your scheduled oil changes. Think of it as insurance for your engine’s internals.
If you are someone who rides frequently or in hot weather, you may need to change your oil more often. Extreme conditions break down oil faster. Keep track of your riding habits and adjust your maintenance routine accordingly.
Common Mistakes When Checking Primary Oil
Even experienced riders make mistakes when checking or changing primary oil. Here are the most common ones to avoid:
- Overfilling the primary case: Too much oil causes foaming and pressure buildup. This can lead to leaks and clutch issues. Always stick to the recommended amount.
- Using the wrong oil type: Not all oils work the same in a Harley primary chain case. Car oils and motorcycle oils have different formulations. Using the wrong one can hurt your clutch.
- Skipping the warm-up: Checking oil on a cold engine gives you an inaccurate reading. Always warm it up first.
- Not torquing plugs properly: Loose plugs cause leaks. Over-tightening can strip threads. Use a torque wrench every time.
- Ignoring the drain plug magnet: The magnet catches metal debris. Inspecting it gives you early warning of internal problems.
One mistake that catches many riders off guard is mixing oil brands without checking compatibility. If you need to top off between changes and cannot find the exact brand, make sure the oil type and weight match. Can you mix oil brands? Sometimes yes, but it is always safer to stick with one brand and type for consistency.
Another issue riders run into is confusing primary oil with engine oil. They are different fluids that serve different purposes. Your engine has its own oil system, and the primary chain case has its own. Never mix them up or substitute one for the other.
Expert Tips for Harley-Davidson Primary Oil Maintenance
Want to take your primary oil maintenance to the next level? These expert tips will help you get the most out of your Harley:
Check your oil before every ride. It takes less than two minutes and gives you peace of mind. A quick visual inspection of the oil level and condition can catch problems before they become serious. Make this a habit and your bike will thank you.
Keep a maintenance log. Write down every oil change and check. Note the date, mileage, oil type, and any observations. This history helps you spot trends and stay on top of your Harley-Davidson maintenance schedule. It also comes in handy if you ever sell the bike.
Invest in quality oil. Premium primary oil costs a bit more but offers better protection. Look for oils specifically designed for Harley-Davidson primary chain cases. These formulations handle the heat and pressure your primary system endures.
Do not ignore leaks. Even small drips mean something is off. A leaking fill plug or drain plug can lead to low oil levels over time. Low oil levels increase friction and wear on your primary components. If you notice any leaks, address them right away.
Consider the riding conditions. If you ride in extreme heat, stop-and-go traffic, or carry heavy loads, your oil works harder. These conditions may require more frequent oil changes. Adjust your maintenance routine based on how and where you ride.
When in doubt, consult a professional. While checking primary oil is straightforward, some issues need a trained eye. If you notice unusual noises, clutch problems, or persistent low oil levels, take your Harley to a certified technician. Regular Harley-Davidson primary service at a dealership or shop can catch things you might miss.
Conclusion
Checking the primary oil on your Harley-Davidson is a simple task that makes a huge difference. It takes just a few minutes and requires minimal tools. By staying on top of your primary oil levels and quality, you protect your bike’s internals and enjoy a smoother ride every time you hit the road.
Make it a habit to check your oil regularly. Change it on schedule and never ignore warning signs. Your Harley was built to last, and proper maintenance is the key to keeping it running strong for years to come. Whether you are a seasoned rider or just getting started, taking care of your primary oil is one of the best things you can do for your motorcycle.
Remember, every ride starts with a well-maintained bike. Take the time to care for your Harley, and it will reward you with countless miles of freedom and enjoyment. Now grab your tools and give your primary oil a check. Your bike will thank you for it.
Can I check primary oil the same way I check transmission fluid?
The process is similar in concept but different in execution. Can I check transmission fluid myself? Yes, and checking primary oil follows a similar DIY approach. Both involve locating a plug, draining or filling, and checking the level. However, the primary chain case has its own specific requirements and oil type, so do not treat them as identical tasks.
What happens if I overfill my Harley primary oil?
Overfilling causes the oil to foam, which reduces its lubricating ability. Foamed oil can also create excess pressure inside the primary chain case. This may lead to leaks around the plugs or seals. Always add oil slowly and stop when it reaches the bottom of the fill port opening.
Can I use car oil for my Harley primary chain case?
It is not recommended. Car oils contain friction modifiers that can interfere with clutch engagement in motorcycles. Always use oil that is rated for Harley-Davidson primary use. Check your owner’s manual for the exact specification your model requires.
How often should I change my Harley primary oil?
Most Harley-Davidson manuals recommend changing primary oil every 10,000 miles or once a year, whichever comes first. If you ride in extreme conditions or carry heavy loads, consider changing it more frequently. Sticking to a regular schedule keeps your primary chain case in great shape.
What oil weight should I use for my Harley primary?
The correct oil weight depends on your specific Harley model and riding conditions. Most Harleys use a specific primary oil weight, such as Harley-Davidson Primary Fluid or a compatible alternative. Always refer to your owner’s manual for the recommended weight and type. Using the wrong weight can affect clutch feel and gear protection.
Is it normal for primary oil to darken quickly?
Yes, it is normal. Primary oil darkens as it heats up and picks up microscopic metal particles from normal operation. However, if the oil turns black very quickly or has a strong burnt smell, it may indicate a problem. In that case, change the oil sooner and inspect for any internal issues.
Frequently Asked Questions
What is How to Check Primary Oil on Harley-Davidson?
How to Check Primary Oil on Harley-Davidson is an important topic with many practical applications.