How Long to Disconnect Battery to Reset Check Engine Light
Disconnecting your battery for 15 to 30 minutes is the standard method to reset a check engine light. This simple trick clears stored error codes and gives your car’s computer a fresh start. However, the exact time depends on your vehicle model and what triggered the light in the first place. Always disconnect the negative terminal first and wait long enough for the ECU to fully power down.
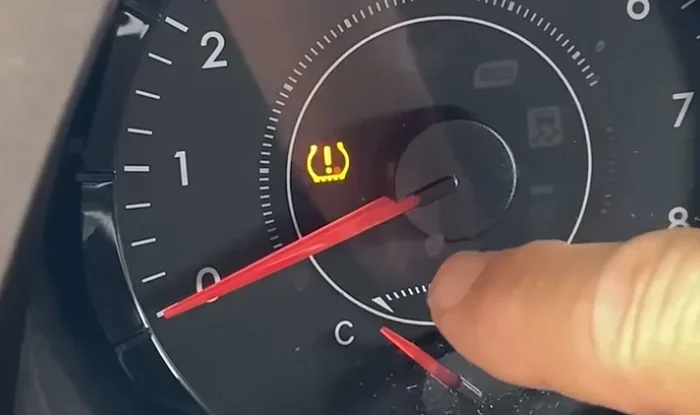
That little yellow warning light on your dashboard can send anyone into a panic. One moment you are driving along, and the next, your check engine light is glowing like a tiny alarm. It is stressful, confusing, and honestly, a bit annoying.
You are not alone. Millions of drivers face this situation every single day. The good news is that you do not always need a mechanic to fix it. In many cases, a simple battery disconnect can reset the light and clear the error codes. But here is the big question most people ask: how long should you actually disconnect the battery?
This guide walks you through the entire process. You will learn the exact timing, the safe steps to follow, and what to expect after you reconnect everything. Whether you are a complete beginner or a seasoned DIYer, you will find practical advice that actually works.
Let us get into it. Your car is waiting, and so is your peace of mind.
Key Takeaways
- 15 to 30 minutes: The typical disconnect time needed to fully reset your car’s ECU and clear check engine codes.
- Negative terminal first: Always remove the negative battery cable to avoid short circuits and electrical damage.
- The light may return: If the underlying problem is not fixed, the check engine light will come back after driving.
- A multimeter helps: Testing your battery before and after ensures your electrical system is healthy.
- Drive cycles matter: After resetting, you may need to complete a drive cycle for all systems to recalibrate.
- OBD scanners offer a faster alternative: A diagnostic tool can clear codes without disconnecting the battery at all.
- Safety first: Work in a ventilated area, wear gloves, and never disconnect the battery while the engine is running.
📑 Table of Contents
- Why Does the Check Engine Light Come On?
- How Long to Disconnect the Battery to Reset the Check Engine Light
- Step-by-Step Guide to Disconnecting Your Battery
- Is Disconnecting the Battery the Best Way to Reset the Light?
- Common Mistakes People Make When Resetting the Check Engine Light
- When Should You See a Mechanic Instead?
- Preventing the Check Engine Light from Coming Back
- Final Thoughts
Why Does the Check Engine Light Come On?
Before you grab a wrench, it helps to understand what triggered the light in the first place. Your car has a built-in computer called the Engine Control Unit, or ECU. This computer constantly monitors sensors throughout the engine and exhaust system. When something goes wrong, the ECU stores a fault code and turns on the check engine light.
The causes range from minor to serious. Sometimes it is as simple as a loose gas cap. Other times, it signals a real problem that needs attention. Here are some common reasons the light shows up:
- Loose or faulty gas cap: This is the number one culprit. A loose cap lets fuel vapors escape and triggers an emissions code.
- Oxygen sensor issues: The sensor measures unburned oxygen in your exhaust. When it fails, your fuel economy drops and the light comes on.
- Catalytic converter problems: A failing converter is expensive to fix but common in older vehicles.
- Mass airflow sensor failure: This sensor tells the ECU how much air enters the engine. Dirt or damage can throw it off.
- Spark plug or ignition coil trouble: Worn plugs cause misfires that show up as error codes.
- Battery or charging system faults: A weak battery or bad alternator can confuse the ECU and light up the dashboard.
Understanding the root cause matters because resetting the light does not fix the problem. It just clears the code. If the issue is still there, the light will return. That is why many people also ask, can a check engine light go off by itself? Yes, it can. Minor issues sometimes clear after a few drive cycles. But for stubborn lights, a manual reset is usually needed.
How Long to Disconnect the Battery to Reset the Check Engine Light
This is the section you have been waiting for. The answer is not a single number. It depends on a few factors, including your vehicle type, how long the light has been on, and whether the ECU needs a full reboot.
The Standard Time: 15 to 30 Minutes
For most vehicles, disconnecting the battery for 15 to 30 minutes is enough to reset the check engine light. This gives the ECU plenty of time to drain its stored power and forget all the saved fault codes. When you reconnect the battery, the computer starts fresh with a clean slate.
Some people say you only need five minutes. That is not quite true. The ECU needs time to fully power down and clear its memory. Fifteen minutes is a safe minimum. Thirty minutes gives you extra insurance that everything has been wiped clean.
Factors That Affect the Reset Time
Not all cars are the same. Several things can change how long you need to wait:
- Vehicle age: Older cars from the 1990s often reset faster. Newer vehicles with complex computers may take longer.
- ECU type: Some modern ECUs store data in non-volatile memory. This means they keep certain codes even after a power loss. A longer disconnect helps clear these.
- How long the light has been on: If the light has been glowing for weeks, the ECU may have stored multiple deep codes. These take more time to erase.
- Battery condition: A weak battery may not hold enough charge to fully reset the system. Testing your battery with a multimeter before starting is a smart move.
If you are wondering whether the battery itself could be causing the wrench light or check engine light, that is a valid concern. A bad battery can cause the wrench light to come on because the ECU relies on a stable voltage supply. Fluctuating power can trigger false codes and warning lights.
What Happens When You Disconnect the Battery?
When you pull the battery cable, you cut power to the entire electrical system. The ECU loses its stored data, including saved fault codes and learned adaptation values. Think of it like restarting a computer. Everything goes back to factory defaults.
Here is what happens step by step:
- The ECU loses power and stops running.
- Stored fault codes are erased from short-term memory.
- Adaptation values (like idle speed settings) return to default.
- When you reconnect the battery, the ECU boots back up.
- The system begins relearning your driving habits.
This relearning period is important. Your car may idle a little rough for the first few drives. The transmission might shift differently. These are normal temporary changes. They usually go away after a few days of normal driving.
Step-by-Step Guide to Disconnecting Your Battery
Now that you know the timing, let us walk through the actual process. Following the right steps keeps you safe and protects your car’s electronics.
Step 1: Gather Your Tools
You do not need much for this job. Here is what you should have ready:
- A wrench or socket set (usually 10mm for battery terminals)
- Safety gloves
- Safety goggles
- A memory saver device (optional but helpful)
- A car battery tester or multimeter
A memory saver is a small device that plugs into the OBD port. It keeps your radio presets, clock, and ECU adaptations alive during the disconnect. Not everyone needs one, but it saves a lot of frustration.
Step 2: Park Safely and Turn Off the Engine
Find a flat, well-ventilated spot. Turn off the engine and remove the key from the ignition. Do not disconnect the battery while the engine is running. This can cause voltage spikes that damage sensitive electronics.
Also, make sure your radio is off and all accessories are shut down. You want to minimize any electrical draw before you start.
Step 3: Locate the Battery and Identify the Terminals
Pop the hood and find your battery. You will see two terminals: positive (red, marked with a +) and negative (black, marked with a -). The order matters a lot here.
Always disconnect the negative terminal first. This prevents short circuits. If you accidentally touch a metal tool to the positive terminal while the negative is still connected, you could create a spark and damage your car’s electrical system.
Step 4: Remove the Negative Terminal Cable
Use your wrench to loosen the nut on the negative terminal. Once loose, carefully lift the cable off the post. Tuck it away from the battery so it cannot accidentally touch the terminal again.
Now you wait. Set a timer for at least 15 minutes. For newer vehicles or stubborn lights, wait closer to 30 minutes. This gives the ECU enough time to fully discharge and clear all stored data.
Step 5: Reconnect the Battery
After waiting, it is time to reconnect. Attach the negative cable first, then the positive. Tighten the nuts firmly but do not overtighten. You want a solid connection without damaging the terminal.
Start the engine and let it idle for a few minutes. You may notice the check engine light is off. That is a good sign. But do not celebrate just yet. You need to drive the car and see if the light stays off.
Step 6: Complete a Drive Cycle
After a battery reset, your car needs a drive cycle to recalibrate all its sensors. A drive cycle is a series of specific driving conditions that allow the ECU to test all systems and confirm everything is working properly.
Here is a simple drive cycle you can follow:
- Start the engine and let it idle for 2 to 3 minutes.
- Drive at moderate speed (30 to 50 mph) for 5 to 10 minutes.
- Accelerate gently to 55 mph and hold for 2 to 3 minutes.
- Slow down and stop. Let the car idle for another 2 minutes.
- Repeat this cycle 2 to 3 times over the next day or two.
During this time, the ECU relearns your driving patterns and resets its adaptation values. If the underlying issue was minor, the check engine light should stay off. If it comes back, you have a real problem that needs fixing.
Is Disconnecting the Battery the Best Way to Reset the Light?
Battery disconnect is popular because it is free and simple. But it is not the only option. Let us look at the pros and cons compared to other methods.
Battery Disconnect vs. OBD Scanner
An OBD scanner plugs directly into your car’s diagnostic port. It reads and clears fault codes without touching the battery. Many auto parts stores will do this for free. You can also buy a basic scanner for under $30.
Here is how the two methods compare:
| Feature | Battery Disconnect | OBD Scanner |
|---|---|---|
| Cost | Free | Free at auto parts stores, or $20-$100 for a personal scanner |
| Time Required | 15-30 minutes of waiting | 5-10 minutes |
| Clears All Codes | Yes | Yes |
| Clears Adaptation Values | Yes | No (usually) |
| Risk of Data Loss | Yes (radio presets, clock, etc.) | No |
| Need for Drive Cycle | Yes | Yes |
| Works Without Power Source | Yes | No (needs working battery) |
The battery disconnect method has a unique advantage: it resets adaptation values along with the codes. These values are the learned settings your ECU adjusts over time based on your driving style. A scanner usually does not clear these. So if your car has been running slightly off for a while, a full battery disconnect can sometimes improve performance after the reset.
On the other hand, an OBD scanner is faster and does not risk losing your radio presets or clock settings. It also lets you read the codes first, so you know exactly what triggered the light. This helps you decide whether the problem is something you can fix yourself or needs a mechanic.
Some people wonder if they can just run diagnostics without a check engine light being present. The answer is no. The check engine light is the signal that tells you something needs attention. Without it, the ECU may not flag active problems, and you could miss a developing issue.
Common Mistakes People Make When Resetting the Check Engine Light
Even a simple task like a battery disconnect can go wrong if you are not careful. Here are the mistakes to avoid:
Mistake 1: Not Fixing the Underlying Problem
This is the biggest mistake people make. They reset the light, drive for a few days, and wonder why it comes back. The check engine light is a symptom, not the disease. If you have a loose gas cap, tighten it. If you have a faulty sensor, replace it. Resetting the light without fixing the root cause is just a temporary band-aid.
Mistake 2: Disconnecting the Positive Terminal First
Always remove the negative terminal first. Removing the positive first can cause sparks and short circuits. It can also damage your car’s computer and other electronic components. The negative cable grounds the circuit, so removing it first breaks the circuit safely.
Mistake 3: Not Waiting Long Enough
Five minutes is not enough time for most vehicles. The ECU needs at least 15 minutes to fully discharge and clear all codes. If you reconnect too early, some codes may remain stored, and the light will return.
Mistake 4: Ignoring the Drive Cycle
After resetting, your car needs time to relearn. Skipping the drive cycle means the ECU has not fully recalibrated. You may notice poor fuel economy, rough idling, or shifting issues. Give your car a few days of normal driving to adjust.
Mistake 5: Resetting the Light Before an Inspection
Some people try to reset the light right before a state inspection. This rarely works. Modern inspection machines read live data from the ECU. They can tell if the light was recently cleared. The best approach is to actually fix the problem and then have the car inspected.
When Should You See a Mechanic Instead?
A battery disconnect works great for minor issues. But some situations call for professional help. You should see a mechanic if:
- The check engine light is flashing. A flashing light usually indicates a serious engine misfire that can damage your catalytic converter.
- You notice other warning lights alongside the check engine light. Multiple lights suggest a bigger problem.
- Your car is running rough, stalling, or losing power. These symptoms point to mechanical issues that a simple reset will not fix.
- The light keeps coming back after you reset it. This means there is a persistent problem that needs diagnosis.
- You have already tried a battery disconnect and an OBD scan, but the light returns within a few days.
Sometimes the issue is electrical rather than mechanical. A weak battery can cause all sorts of strange warning lights. If you suspect your battery is the problem, get it tested. You can test it yourself with a multimeter or ask any auto parts store to check it for free.
It is also worth noting that battery health affects more than just the check engine light. A dying battery can cause the wrench light, make your car hard to start, or even affect your hybrid system. If you drive a Toyota hybrid, for example, a bad battery can trigger multiple warning lights at once. So always rule out battery problems first before diving into deeper repairs.
Preventing the Check Engine Light from Coming Back
Once you have successfully reset the light, you want to keep it off. Here are some simple habits that help:
- Check your gas cap regularly: Make sure it clicks tightly after every fill-up. A loose cap is the number one cause of check engine lights.
- Keep up with oil changes: Old or low oil can trigger sensors and cause engine problems over time.
- Use quality fuel: Cheap or contaminated fuel can cause misfires and sensor errors.
- Inspect spark plugs: Worn spark plugs lead to misfires that show up as error codes.
- Monitor your battery health: Test your battery at least once a year, especially if your car is 3 years or older.
- Address small issues early: Do not ignore minor symptoms like rough idling or reduced fuel economy. They often point to problems that get worse over time.
Prevention is always easier and cheaper than repair. A little attention goes a long way toward keeping your check engine light off and your car running smoothly.
Final Thoughts
Resetting your check engine light by disconnecting the battery is one of the simplest and most effective DIY fixes you can do. The key is knowing how long to disconnect the battery to get a full reset. For most vehicles, 15 to 30 minutes is the sweet spot. Always disconnect the negative terminal first, wait long enough, and then complete a proper drive cycle after reconnecting.
Remember, resetting the light is not a permanent fix. It just clears the codes so you can start fresh. If the underlying problem is still there, the light will return. Use this method for minor issues like a loose gas cap or a temporary sensor glitch. For serious problems, get your car properly diagnosed and repaired.
Your car talks to you through those dashboard lights. Listening to it and responding quickly can save you from bigger headaches down the road. So the next time that yellow light pops on, do not panic. You now know exactly what to do.
Stay proactive, keep your car maintained, and enjoy the confidence that comes with understanding your vehicle. A little knowledge goes a long way, and you are now better equipped to handle one of the most common dashboard warnings out there.
Frequently Asked Questions
Can I disconnect my battery for too long?
No, disconnecting the battery for a longer period will not harm your car. However, you may lose radio presets, clock settings, and other stored preferences. Some vehicles also need a relearn procedure for power windows and sunroof after a long disconnect.
Will disconnecting the battery erase my saved radio stations?
Yes, in most cases. Disconnecting the battery resets the entire electrical system, including the radio memory. You will need to reprogram your stations after reconnecting. A memory saver device can prevent this.
How do I know if the check engine light reset was successful?
After reconnecting the battery and starting the engine, the check engine light should be off. Drive for a few days and monitor the dashboard. If the light stays off, the reset worked. If it returns, there is an ongoing issue that needs attention.
Can a dead battery cause the check engine light to come on?
Yes, absolutely. A weak or dead battery can cause voltage fluctuations that confuse the ECU. This can trigger the check engine light even if there is no mechanical problem. Always test your battery if you notice the light appears alongside other electrical issues.
Do I need an OBD scanner after disconnecting the battery?
No, you do not need one for the reset itself. However, using a scanner before and after can help you understand what codes were stored and whether they returned after driving. It is a great tool for DIY diagnostics.
How long does it take for the check engine light to come back after a reset?
If the underlying issue is fixed, the light should stay off permanently. If the problem is not resolved, the light may return within a few drive cycles, usually within 1 to 3 days of normal driving.
=== CONCLUSION ===
Resetting your check engine light through a battery disconnect is straightforward, free, and effective when done correctly. The key timing is 15 to 30 minutes of disconnection, always starting with the negative terminal. Follow the steps in this guide, complete a proper drive cycle afterward, and you give yourself the best chance of a clean reset.
Just remember that the check engine light is your car’s way of telling you something needs attention. Use the reset as a tool, not a permanent solution. Fix the real problem, keep up with regular maintenance, and your car will reward you with reliable performance for years to come.