How Do I Manually Clear Car Trouble Codes The Easy Way
Manually clearing car trouble codes is simpler than most drivers think. With the right tools and a little patience, you can reset your check engine light and get back on the road. This guide walks you through every step, from finding your OBD-II port to completing a drive cycle that verifies the fix. Whether you use a scanner or a battery disconnect method, you will learn the safest and most effective approach to clear car trouble codes without visiting a mechanic.
Your dashboard lights up with a warning you have never seen before. The check engine light is on, and your heart sinks a little. Every driver has been there. The first instinct is panic. The second instinct is to search for a quick fix. What if you could handle this yourself? What if you could manually clear car trouble codes in just a few minutes?
Dealing with engine codes does not have to be scary or expensive. Modern vehicles are packed with computers that monitor everything from fuel mixture to emissions. When something goes wrong, your car speaks to you through these codes. But sometimes, the code is minor, and all you need to do is clear it. This guide shows you exactly how to do that. No mechanic appointment required. No expensive shop bills. Just simple, actionable steps you can follow right now.
We will cover every method you can use to manually clear car trouble codes at home. You will learn about scanners, battery tricks, and what to do after you reset the light. By the end of this article, you will feel confident tackling this common car issue on your own. Let us get started.
Key Takeaways
- Use an OBD-II scanner: This is the most reliable and widely recommended tool for reading and clearing diagnostic trouble codes.
- Record codes first: Always write down or photograph your codes before clearing them. This data helps mechanics diagnose problems faster.
- Try the battery disconnect method: If you do not have a scanner, disconnecting the battery for 15 minutes can reset your ECU and clear codes.
- Complete a drive cycle: After clearing codes, drive your car through a specific pattern to let the system recheck all sensors.
- Do not ignore recurring codes: If the same code returns, there is an underlying issue that needs real repair, not just a reset.
- Check your warranty first: Clearing codes yourself will not void your warranty, but unauthorized repairs might.
- Use quality tools: A cheap code reader may not support all vehicle makes and models. Invest in a reliable diagnostic device.
📑 Table of Contents
- What Are Car Trouble Codes and Why Do They Appear?
- Tools You Need to Manually Clear Car Trouble Codes
- Step-by-Step Guide to Manually Clear Car Trouble Codes
- Alternative Methods to Manually Clear Car Trouble Codes
- What to Do After Clearing Car Trouble Codes
- Common Mistakes to Avoid When Clearing Car Trouble Codes
- Expert Tips for Effective Code Clearing
- Frequently Asked Questions About Clearing Car Trouble Codes
- Conclusion
What Are Car Trouble Codes and Why Do They Appear?
Understanding Diagnostic Trouble Codes
Every modern car built after 1996 uses a system called OBD-II, which stands for On-Board Diagnostics II. This system constantly monitors your engine, transmission, and emissions components. When it detects a problem, it stores a diagnostic trouble code, also known as a DTC. These codes are like error messages your car sends to tell you what is wrong.
Each code starts with a letter followed by four numbers. The letter tells you the category. P stands for powertrain, which covers the engine and transmission. B stands for body, like your air conditioning or airbags. C stands for chassis, covering brakes and suspension. U stands for network communication, which involves your car’s computer network.
For example, a code like P0301 means there is a misfire in cylinder one. A code like P0420 means your catalytic converter is not working efficiently. These fault codes give you a starting point for figuring out what is wrong. They are not always the final answer, but they point you in the right direction.
Common Reasons Codes Appear
Not every check engine light signals a major problem. Some codes are minor and easy to fix. Here are the most common reasons a code might appear:
- Loose or damaged gas cap: This is the number one most common reason. A loose cap lets fuel vapors escape, triggering an emissions code.
- Faulty oxygen sensor: This sensor measures unburned oxygen in your exhaust. When it fails, your fuel economy drops and your engine runs poorly.
- Spark plug or ignition coil issues: Worn spark plugs can cause misfires, which show up as engine codes.
- Catalytic converter problems: A failing converter is more serious and usually requires professional vehicle repair.
- Mass airflow sensor malfunction: This sensor tells your computer how much air enters the engine. Dirt or damage can throw it off.
The good news is that many of these issues are simple and affordable to fix. Before you spend hundreds of dollars, try clearing the code and see if it comes back. Sometimes a minor fix is all it takes.
Tools You Need to Manually Clear Car Trouble Codes
Before you start, you need the right tools. Fortunately, you do not need a garage full of expensive equipment. The tools required are simple and widely available. Here is what you need to get started with automotive diagnostics at home.
OBD-II Scanners
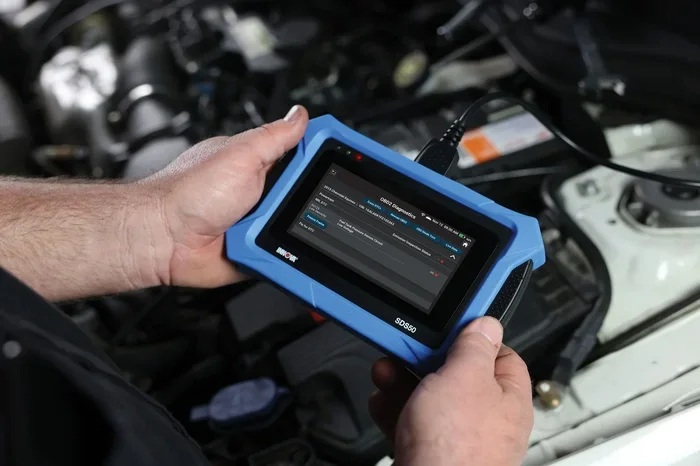
An OBD-II scanner is the best tool for reading and clearing trouble codes. These devices plug directly into your car’s diagnostic port and communicate with the onboard computer. They can read codes, show you what they mean, and clear them when you are ready.
There are two main types of scanners. A basic code reader device is inexpensive and does one job well. It reads and clears codes. A full OBD-II scanner offers more features. It can read freeze frame data, which shows what conditions were present when the code was triggered. It can also display live sensor data and perform advanced ECU reset functions.
Popular brands include Innova, Launch, and Autel. You can find basic code readers for under $30. More advanced scanners cost between $100 and $300. If you plan to do your own car maintenance regularly, investing in a quality scanner is worth every penny.
Code Reader Devices vs. Full Scanners
Here is a quick comparison to help you choose the right tool:
- Code reader devices: Compact, affordable, and easy to use. Great for occasional code reading and clearing. Limited features.
- Full OBD-II scanners: More expensive but much more powerful. They read all systems, show live data, and support advanced functions like pending codes clearing.
- Bluetooth adapters with phone apps: These plug into your OBD port and connect to your smartphone. Apps like Torque or Car Scanner turn your phone into a diagnostic tool. They are affordable and very convenient.
For most DIYers, a mid-range OBD-II scanner or a Bluetooth adapter with a good app will handle everything you need. You can reset check engine light codes quickly and easily with any of these options.
Step-by-Step Guide to Manually Clear Car Trouble Codes
Now that you have your tool ready, let us walk through the process step by step. This is the most common and reliable method for code clearing. Follow these steps carefully and you will have your light off in no time.
Step 1: Locate the OBD-II Port
Every car made after 1996 has an OBD connector port. This port is where you plug in your scanner. On most vehicles, the port is located under the dashboard on the driver side. You may need to look down and to the left of the steering column. Sometimes it is hidden behind a small cover or flap.
If you cannot find it, check your owner manual. The port location is listed there. Some cars also have the port near the center console or behind the ashtray. Once you find it, you are ready for the next step.
Step 2: Turn on Your Vehicle
You do not need to start the engine, but you do need to turn the ignition to the “on” position. This powers up your car’s computer system without starting the engine. Insert your key and turn it to the second position, or press the start button without pressing the brake pedal.
Make sure all your accessories are off. Your headlights, radio, and air conditioning should be off. This ensures the scanner gets a clean connection to the car’s computer.
Step 3: Connect Your Scanner
Plug your OBD-II scanner into the port. The connector is rectangular and fits only one way. Do not force it. Once it is plugged in, the scanner should power on automatically. If it does not, check that the ignition is in the “on” position.
Wait a few seconds for the scanner to establish a connection. Most scanners will display a message saying they are communicating with the vehicle. If you see an error, try unplugging and reconnecting the scanner.
Step 4: Read and Record the Codes
This is the most important step. Before you clear anything, write down every code your scanner shows. Each code will have a description that explains what system or component is affected.
Use your phone to take a photo of the codes. Write them in a notebook. Or use the scanner’s memory function if it has one. You need this information later. If the code comes back after you clear it, you will need the code number to research the problem further.
Some scanners also show freeze frame data. This is a snapshot of your car’s sensor readings at the moment the code was triggered. It is very useful information. Write it down too.
Step 5: Clear the Codes
Now comes the moment of truth. On your scanner, look for the “Clear Codes” or “Erase DTC” function. Select it and confirm. The scanner will send a command to your car’s computer to erase the stored error codes.
Once the codes are cleared, turn the ignition off. Wait about 30 seconds. Then turn the ignition back on to see if the check engine light has gone off. In most cases, it will be off immediately after clearing.
If the light stays on, the scanner may not have cleared the codes properly. Try again. If it still does not work, the issue might be more serious, or you might need a different type of scanner.
Step 6: Complete a Drive Cycle
Clearing codes is not the end of the process. Your car’s computer needs to relearn and recheck all its systems. This is done through a drive cycle. A drive cycle is a specific driving pattern that tests all emissions-related systems.
A basic drive cycle usually involves:
- Starting the car and letting it idle for a few minutes.
- Driving at moderate speeds on city streets for about 10 minutes.
- Driving on the highway at 55 to 65 mph for another 10 minutes.
- Returning home and letting the car idle again.
During this drive cycle, your car’s computer runs tests on the oxygen sensor, catalytic converter, and other key components. If everything is working correctly, the check engine light should stay off. If the light comes back on, the underlying problem was not fixed.
Alternative Methods to Manually Clear Car Trouble Codes
Not everyone has an OBD-II scanner handy. Fortunately, there are alternative methods you can try. These methods work differently but can still clear your engine codes effectively.
Battery Disconnect Method
The battery disconnect method is the oldest trick in the book. It works by cutting power to your car’s computer, which resets the ECU and clears stored codes. Here is how to do it:
- Turn off your engine and all accessories.
- Open the hood and locate the battery.
- Using a wrench, disconnect the negative battery cable first. Always disconnect the negative terminal first for safety.
- Wait at least 15 minutes. Some people wait up to 30 minutes for a full reset.
- Reconnect the negative cable and tighten it securely.
- Turn the ignition on and check if the check engine light is off.
This method works well for most vehicles. However, it also resets other settings like your radio presets, clock, and power window calibration. Some newer cars may need a special procedure to relearn certain settings after a battery disconnect.
Fuse Pull Method
Some mechanics use the fuse pull method as an alternative. This involves removing the fuse for the OBD-II port or the engine control module. By cutting power to the computer, the stored codes are erased.
This method is less common and should be used with caution. Removing the wrong fuse can cause other electrical issues. Check your owner manual before trying this method. If you are not comfortable with it, stick with the scanner or battery disconnect methods.
Comparing the Three Methods
Here is how the three main methods stack up:
- OBD-II Scanner: Most precise and reliable. Allows you to read codes before and after clearing. Best overall method.
- Battery Disconnect: Simple and requires no special tools. Resets all computer settings. Good backup method.
- Fuse Pull: Risky and not recommended for beginners. Can cause unintended electrical problems.
For most drivers, the OBD-II scanner method is the clear winner. It is safe, effective, and gives you valuable diagnostic information. If you do not have a scanner, the battery disconnect method is your next best option.
What to Do After Clearing Car Trouble Codes
Clearing codes is only half the battle. What you do afterward determines whether the problem is truly fixed or just temporarily masked.
Monitor Your Check Engine Light
After completing your drive cycle, pay close attention to the check engine light. If it stays off for several days of driving, the issue was likely minor and has been resolved. If the light comes back on, you have a problem that needs real attention.
When the light returns, do not just clear the code again. That only masks the problem temporarily. Instead, use your scanner to read the code again and research what it means. Common recurring codes point to specific issues like a failing sensor, a vacuum leak, or a wiring problem.
When to See a Professional Mechanic
There are times when clearing codes is not enough. You should see a professional mechanic if:
- The check engine light comes back immediately after clearing.
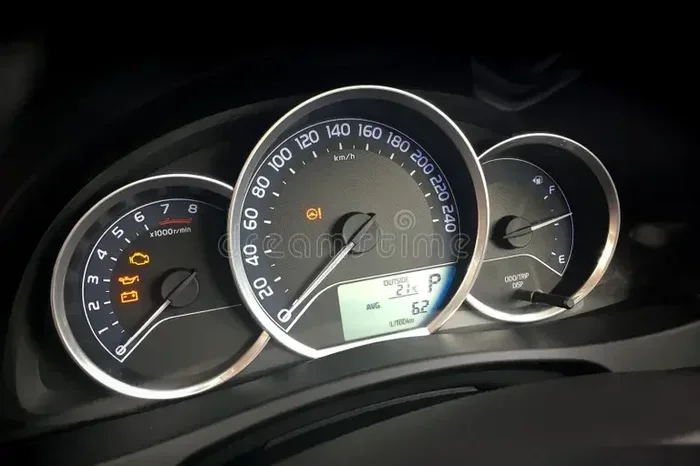
- You see a flashing check engine light, which indicates a serious misfire that can damage your catalytic converter.
- You notice other symptoms like rough idling, stalling, or loss of power.
- The code points to a major component like the catalytic converter or transmission.
- You have tried clearing the code multiple times and it keeps returning.
A professional mechanic has access to advanced diagnostic equipment and years of training. They can dig deeper into the problem and find the root cause. Sometimes a simple pending code turns into a bigger issue that needs professional attention.
Common Mistakes to Avoid When Clearing Car Trouble Codes
Even with the best intentions, people make mistakes when trying to manually clear car trouble codes. Here are the most common errors and how to avoid them.
Clearing Codes Without Reading Them First
This is the biggest mistake people make. They plug in the scanner, see a code, and immediately clear it without writing it down. Later, when the same problem comes back, they have no idea what the code was or what it meant.
Always read and record your codes before clearing them. Take a photo with your phone. Write down the code number and description. This information is gold when it comes time to fix the actual problem or talk to a mechanic.
Ignoring Pending Codes
Not all codes are created equal. Pending codes are codes that have been detected but have not yet triggered the check engine light. They are early warning signs that something is starting to go wrong.
If you clear pending codes and they come back quickly, it means the problem is real and getting worse. Do not ignore them. Address the issue early before it becomes a costly repair.
Repeatedly Clearing Codes Without Fixing the Problem
Some people clear codes over and over again whenever the light comes on. This is called “chasing the light” and it is a bad habit. Each time you clear a code without fixing the underlying problem, you are potentially causing more damage to your vehicle.
Your car’s check engine light exists for a reason. It is telling you something needs attention. Respect that warning and investigate the root cause. Clearing codes should be part of the fix, not a replacement for it.
Using a Cheap or Incompatible Scanner
Not all scanners work with all vehicles. Some cheap code readers only support generic OBD-II codes and cannot read manufacturer-specific codes. If you have a European car like a BMW or Mercedes, or a Japanese car like a Honda or Toyota, you need a scanner that supports your vehicle’s protocols.
Invest in a quality scanner that is compatible with your car. The extra cost is worth the accuracy and reliability you get. A good scanner also updates its code library regularly, so you always have the latest definitions.
Expert Tips for Effective Code Clearing
Here are some professional tips that will make your code clearing experience smoother and more effective:
- Keep a diagnostic log: Track every code you encounter, when it appeared, and what you did about it. This log becomes invaluable over time and helps you spot patterns.
- Check for recalls: Sometimes a check engine light is triggered by a known manufacturer issue. Check online to see if your vehicle has an open recall that might explain the code.
- Use quality fuel: Bad fuel can trigger emissions codes. If you get a code right after filling up, try adding a fuel system cleaner or switching to a different gas station.
- Check your gas cap first: Before you do anything else, make sure your gas cap is tightened properly. This simple fix resolves many codes immediately.
- Stay calm: A check engine light does not always mean catastrophe. Many codes are minor and easily fixed. Stay calm, diagnose properly, and take action step by step.
These tips come from years of hands-on experience with automotive diagnostics. They can save you time, money, and unnecessary stress. Keep them in mind every time you deal with a check engine light.
Frequently Asked Questions About Clearing Car Trouble Codes
Can I manually clear car trouble codes without a scanner?
Yes, you can. The battery disconnect method is the most common way to clear codes without a scanner. Simply disconnect the negative battery terminal for 15 to 30 minutes, then reconnect it. This resets your car’s ECU and clears most stored codes. However, a scanner is still the better option because it lets you read and record codes before clearing them.
Is it safe to manually clear car trouble codes?
Yes, it is generally safe. Clearing codes does not damage your vehicle. However, if there is a real problem causing the code, clearing it without fixing the issue can lead to further damage over time. Always investigate the root cause, especially if the light comes back after clearing.
Why did my check engine light come back after clearing the codes?
If the light returns, it means the underlying problem was not fixed. The car’s computer detected the same issue again during its self-check cycle. You need to address the actual problem causing the code, not just reset the light. Use your scanner to read the code again and research the specific issue.
How long does it take to clear a trouble code?
Using an OBD-II scanner, clearing a code takes just a few minutes. The actual process of reading and erasing codes is very fast. However, completing a full drive cycle to verify the fix can take 30 minutes to an hour of driving, depending on your vehicle and the specific codes.
Will clearing codes void my vehicle warranty?
No, clearing codes yourself will not void your warranty. However, if a dealer finds evidence of tampering or if unauthorized repairs caused the problem, it could affect your warranty coverage. Always keep records of any work you do on your vehicle and be transparent with your dealer.
What is the difference between pending and permanent codes?
Pending codes are early warnings that have not yet triggered the check engine light. Permanent codes are codes that have been confirmed and will not clear until the underlying problem is fixed. Permanent codes require the actual repair to be completed before the scanner can erase them.
Conclusion
Manually clear car trouble codes is a skill every driver should know. It saves you time, money, and the hassle of an unnecessary trip to the mechanic. With an OBD-II scanner or a simple battery disconnect, you can reset your check engine light and get back on the road with confidence.
Remember to always record your codes before clearing them. Complete a proper drive cycle afterward. And most importantly, do not ignore recurring codes. They are your car’s way of telling you something needs attention. By following the steps in this guide, you will handle trouble codes like a pro and keep your vehicle running smoothly for years to come.
Take charge of your car maintenance today. The next time your check engine light comes on, you will know exactly what to do. You have the knowledge, the tools, and the confidence to handle it yourself. That is what this guide is all about. Go ahead and give it a try. Your car and your wallet will thank you.