Should I Put Clear Coat Over Touch-Up Paint Today
Should I put clear coat over touch-up paint? The short answer is yes, and it is one of the best decisions you can make for your car’s finish. Applying a clear coat over touch-up paint protects the repair from UV rays, moisture, and daily wear. In this guide, we walk you through everything you need to know about clear coat application, from preparation to final results.
Every car owner knows the frustration of seeing a scratch or chip on their vehicle. Whether it came from a parking lot mishap, a road pebble, or just years of wear, those little imperfections bother us. One of the most common questions we hear is, should I put clear coat over touch-up paint? It seems like a simple question, but the answer has some important layers to it.
The good news is that applying a clear coat over touch-up paint is not only possible, it is often the best way to ensure your repair holds up over time. A clear coat finish adds depth, shine, and a protective barrier that bare touch-up paint simply cannot provide on its own. In this article, we will break down exactly why clear coat matters, how to apply it correctly, and what mistakes to avoid along the way.
Whether you are a weekend DIYer or someone who has never touched a can of paint before, this guide is for you. We will walk through each step in plain language so you feel confident making the repair yourself. Let us get into it.
Key Takeaways
- Clear coat protects your repair: It shields touch-up paint from UV damage, moisture, and everyday scratches.
- Application matters: Proper prep, drying time, and spraying technique make all the difference in your final result.
- Wait for the right moment: Always let touch-up paint dry fully before adding a clear coat layer.
- Avoid common mistakes: Skipping prep, applying too thick, or using the wrong product can ruin your repair.
- Know when to call a pro: Deep scratches or rust damage may need professional attention instead of a DIY fix.
- Maintenance extends the life: Regular washing and waxing keep your clear coat finish looking great for years.
- The right products count: Use automotive-grade clear coat and touch-up paint that match your vehicle’s specifications.
📑 Table of Contents
- What Is Touch-Up Paint and Why Does It Matter
- The Role of Clear Coat on Your Vehicle
- Should You Put Clear Coat Over Touch-Up Paint
- Step-by-Step Guide to Applying Clear Coat Over Touch-Up Paint
- Common Mistakes People Make When Applying Clear Coat
- When to Call a Professional Instead
- How to Maintain Your Clear Coat Finish
- Final Verdict on Clear Coat Over Touch-Up Paint
What Is Touch-Up Paint and Why Does It Matter
Touch-up paint is a small amount of automotive paint that matches your vehicle’s original color code. You apply it directly into chips, scratches, or scuffs on your car’s body panel. Think of it as a bandage for your paint job. It fills in the damaged spot and prevents bare metal from being exposed to the elements.
But here is the thing. Touch-up paint alone does not do the full job. It lacks the durability and glossy finish that your car originally had from the factory. That is where automotive clear coat comes into play. The touch-up paint restores the color, but the clear coat restores the protection and shine.
Why Touch-Up Paint Needs Support
Your car’s original paint system has three layers. There is the base coat, which gives your car its color. Then there is the primer coat, which helps the paint stick to the metal. Finally, there is the clear coat, which sits on top and provides a hard, glossy shield. When you apply touch-up paint, you are usually only replacing the base coat layer. Without the clear coat on top, that repair is vulnerable.
UV rays from the sun will fade unprotected touch-up paint over time. Rain and moisture can cause it to chip or bubble. Even a simple car wash can scratch bare touch-up paint if it has no clear coat protection. This is exactly why paint protection through a clear coat layer is so important.
The Role of Clear Coat on Your Vehicle
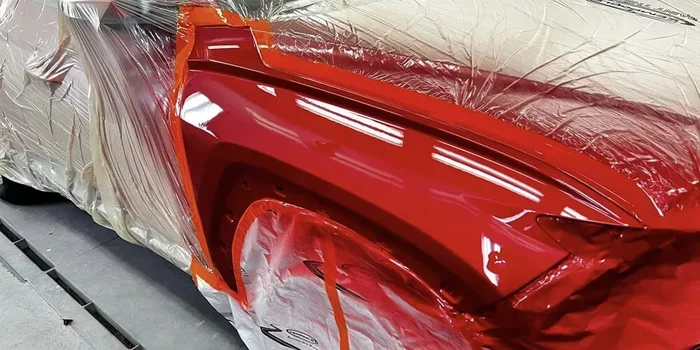
The clear coat is the outermost layer of your car’s paint system. It is a transparent, durable coating that gives your vehicle that deep, wet-looking shine. More importantly, it acts as a armor for everything underneath it, including your touch-up paint repairs.
Modern cars rely heavily on clear coat for their finish. If you look at a brand-new car, that glass-like shine you see is the clear coat doing its job. It reflects light beautifully and keeps the paint below it safe from damage.
What Happens Without Clear Coat
When you leave touch-up paint uncovered, several things start to happen. The color can fade within weeks from sun exposure. The repair might start to peel or flake after a few months. Moisture can seep in and cause rust prevention to fail, leading to oxidation on the bare metal around the chip. Over time, a small repair turns into a much bigger and more expensive problem.
Applying clear coat spray over your touch-up paint creates a sealed barrier. This barrier locks in the paint and keeps out harmful elements. It also gives the repair a finished look that blends with the rest of the car’s surface. The difference between a repair with clear coat and one without is night and day.
Should You Put Clear Coat Over Touch-Up Paint
The direct answer to should I put clear coat over touch-up paint is a resounding yes. In almost every situation, adding a clear coat layer over your touch-up paint is the right move. It extends the life of your repair, improves the appearance, and adds a layer of auto paint care that your car needs.
However, there are a few conditions that need to be met first. You need to make sure the touch-up paint is fully dry. You need to choose the right type of clear coat for your vehicle. And you need to apply it correctly to avoid issues like runs, drips, or a cloudy finish.
When Clear Coat Over Touch-Up Paint Is a Good Idea
Here are the situations where adding a clear coat makes perfect sense:
- You have a small chip or scratch that you have already filled with matching touch-up paint.
- The touch-up paint has dried completely and you want to seal it for long-term protection.
- You notice the repair looks dull or flat compared to the surrounding paint.
- You want to prevent rust from forming around a damaged area on your vehicle’s body panels.
- You are doing a paint chip repair and want the finished result to look as close to factory as possible.
When You Should Skip the Clear Coat
There are a few rare cases where you might want to hold off on the clear coat. If the touch-up paint is still wet, adding clear coat on top will cause the two layers to mix and create a messy, uneven result. If the surrounding paint is severely damaged or rusted, you may need more extensive vehicle body repair before a simple clear coat will help. And if you are unsure about the match or the process, it is always okay to consult a professional first.
Step-by-Step Guide to Applying Clear Coat Over Touch-Up Paint
Now that you know you should apply clear coat, let us walk through the process step by step. Following these steps carefully will give you the best possible result and help your repair look professional.
Step One: Prepare the Area
Before you do anything, clean the repaired area thoroughly. Use a mild car wash soap and water to remove dirt, grease, and debris from around the chip or scratch. Dry the area completely with a soft microfiber cloth. Any dust or moisture left on the surface will affect how well the clear coat adheres.
Next, use a fine-grit sandpaper, around 2000 grit, to gently smooth the edges of the touch-up paint. This helps the clear coat bond properly. Wipe the area down again with a tack cloth to remove any sanding dust. This preparation step is one of the most overlooked parts of automotive paint repair, but it makes a huge difference.
Step Two: Choose the Right Clear Coat Product
Not all clear coats are created equal. Look for an automotive clear coat that is specifically designed for car paint. Many brands make spray-can versions that are easy to use at home. Make sure the product you choose is compatible with the type of paint on your vehicle. If you are unsure, check your owner’s manual or contact the manufacturer.
You also want to consider the clear coat drying time. Most automotive clear coats need between 24 and 48 hours to fully cure. Plan your application for a day when you will not need to drive the car or expose it to rain.
Step Three: Apply the Clear Coat
Shake the can of clear coat vigorously for at least two minutes. Hold the can about 10 to 12 inches away from the surface. Apply thin, even coats rather than one thick layer. Thin coats dry better and are less likely to drip or sag.
Start spraying just outside the repaired area and sweep across it. This technique, known as paint blending, helps the clear coat transition smoothly into the surrounding paint. Apply two to three thin coats, waiting about 10 minutes between each coat. Allow the final coat to dry according to the product instructions before touching or buffing the area.
Step Four: Buff and Inspect
Once the clear coat has fully cured, use a polishing compound and a soft cloth to buff the area. This removes any haze and brings out the shine. Compare the repaired spot to the surrounding paint in different lighting conditions. The goal is to make the repair nearly invisible.
Quick Tips for a Better Finish
- Work in a shaded, dust-free area to avoid particles landing on wet clear coat.
- Do not apply clear coat in direct sunlight or on a hot surface.
- Use light, even sprays rather than heavy bursts.
- Wear a mask to protect yourself from fumes during application.
- Allow plenty of curing time before washing or waxing your car.
Common Mistakes People Make When Applying Clear Coat
Even with the best intentions, mistakes happen. Knowing what to avoid will save you time, money, and frustration. Here are the most common errors people make when applying clear coat over touch-up paint.
Mistake One: Skipping Surface Preparation
This is the number one mistake. If you do not clean and sand the area properly, the clear coat will not adhere well. It may peel off within weeks, leaving you right back where you started. Take the time to prep the surface, and your repair will last much longer.
Mistake Two: Applying Too Thick a Coat
Thick coats of clear coat cause runs, drips, and a cloudy appearance. They also take much longer to dry and cure properly. Stick with thin, even layers and build up gradually. Patience here pays off big time.
Mistake Three: Not Matching the Paint Code
Using the wrong color touch-up paint means even the best clear coat job will look obvious. Always find your vehicle’s paint code, usually found on a sticker inside the driver’s door jamb, and purchase the matching touch-up paint before you start.
Mistake Four: Ignoring the Drying Time
Every clear coat product has a recommended drying and curing time. If you buff or wash the area too soon, you risk scratching or damaging the fresh coat. Read the instructions on your product and follow them closely.
Mistake Five: Forgetting About Waxing
Once your clear coat has fully cured, apply a quality car wax to seal everything in. Wax adds an extra layer of paint sealant protection and enhances the depth and shine of your repair. It is the final step that many people forget.
When to Call a Professional Instead
There is no shame in admitting that some repairs are beyond a DIY fix. If your scratch goes all the way through the clear coat and into the primer or bare metal, you may need professional help. Deep damage like this requires more than just touch-up paint and a clear coat spray.
Similarly, if you notice rust forming around the damaged area, a professional can properly treat the rust before it spreads. They have access to industrial-grade tools and materials that produce a more durable and seamless finish. For major automotive clear coat damage or large areas of paint loss, visiting a body shop is the smart move.
That said, for small chips, minor scratches, and surface-level damage, a DIY repair with touch-up paint and clear coat is a perfectly viable option. It saves you money and gives you a sense of accomplishment when you see the finished result.
How to Maintain Your Clear Coat Finish
Once you have completed your repair and the clear coat is fully cured, you will want to keep it looking great. Regular maintenance goes a long way toward preserving your work and extending the life of your car’s paint.
Wash your car regularly using a gentle, pH-balanced car wash soap. Avoid harsh detergents or automatic car washes with stiff brushes, as these can scratch the clear coat. Dry your car with a soft microfiber cloth after every wash to prevent water spots.
Apply a coat of car wax every two to three months. This protects the clear coat from UV damage and environmental contaminants. If you live in an area with harsh winters or heavy salt on the roads, consider using a ceramic coating for even stronger protection.
Park your car in a garage or under a shade whenever possible. Prolonged exposure to direct sunlight is one of the biggest enemies of any paint finish, including clear coat. A little extra care in how you store your vehicle can keep your repair looking fresh for years to come.
Final Verdict on Clear Coat Over Touch-Up Paint
So, should I put clear coat over touch-up paint? Absolutely yes. Adding a clear coat finish over your touch-up paint is the single best thing you can do to protect and enhance your repair. It seals in the color, provides a glossy and professional-looking surface, and shields the area from UV rays, moisture, and daily wear and tear.
The process is straightforward and does not require advanced skills. With the right products, a little patience, and careful attention to each step, you can achieve results that look nearly factory-fresh. Just remember to prep the surface properly, apply thin even coats, and allow plenty of drying time.
Take the time to do the job right, and your car will thank you with a finish that looks great and lasts for years. Do not let a small chip or scratch turn into a bigger problem. Grab your touch-up paint, pick up a can of clear coat spray, and give your car the protection it deserves today.
Frequently Asked Questions
Can I apply clear coat directly over touch-up paint without sanding?
It is not recommended. Lightly sanding the touch-up paint with fine-grit sandpaper helps the clear coat bond properly. Skipping this step can lead to peeling or poor adhesion over time. A quick sanding job takes just a few minutes and makes a big difference in the durability of your repair.
How long should I wait before applying clear coat over touch-up paint?
You should wait until the touch-up paint is completely dry. Most touch-up paints need at least 24 hours to dry fully. Check the product instructions on your touch-up paint can for the recommended drying time. Applying clear coat too early can cause the layers to mix and create an uneven finish.
What type of clear coat is best for touch-up paint repairs?
An automotive-grade spray clear coat is the best choice for most DIY repairs. Look for products that are specifically designed for car paint and match your vehicle’s clear coat type. Urethane-based clear coats are popular because they offer excellent durability and a high-gloss finish that blends well with the surrounding paint.
Will clear coat hide the touch-up paint color difference?
The clear coat adds shine and depth, which helps the repair blend better with the surrounding paint. However, if the touch-up paint color does not match perfectly, the clear coat will not fix that. This is why choosing the correct paint code and color match is essential before you start any repair work.
Can I wax my car after applying clear coat over touch-up paint?
Yes, but you need to wait for the clear coat to fully cure first. Most automotive clear coats need 48 to 72 hours to cure completely. Once it is fully hardened, you can safely apply a quality car wax to protect and enhance the finish. Waxing too early can trap moisture and affect the cure process.
Is it better to use a brush or a spray can for clear coat application?
A spray can is generally better for most touch-up paint repairs. It provides a thinner, more even coat that is easier to control. Brushes can leave visible brush marks and are harder to blend smoothly. If you are new to automotive paint repair, a spray can is the simpler and more forgiving option to work with.