How to Replace the Alternator on a 2013 Hyundai Elantra
Replacing the alternator on a 2013 Hyundai Elantra is a doable DIY job with basic tools. This guide walks you through every step, from identifying alternator problems to installing the new unit. You will save hundreds of dollars in shop labor and gain confidence in your car maintenance skills.
Your 2013 Hyundai Elantra has been running great for years. Then one morning, the battery light flickers on. Or maybe your headlights look dimmer than usual. These are signs that your alternator might be going bad. Before you call a mechanic and pay hundreds of dollars, consider doing the job yourself.
Replacing the alternator on a 2013 Hyundai Elantra is one of the most satisfying DIY repairs you can do. The engine bay is open and easy to access. The parts are affordable. And the process is straightforward if you follow the right steps. This guide covers everything you need to know, from spotting a bad alternator to testing the new one.
Whether you are a beginner or a weekend wrench-turner, you will find clear instructions here. We break down each step so you can work confidently. Let us get your Elantra charging properly again.
Key Takeaways
- Know the symptoms: A dead battery, dim lights, and the battery warning light all point to a failing alternator.
- Gather your tools first: You need a socket set, ratchet, serpentine belt tool, and a new alternator.
- Disconnect the battery: Always remove the negative terminal before starting any electrical work.
- Release the serpentine belt tension: This is the trickiest part, but a belt tensioner tool makes it easy.
- Swap the wiring carefully: Take a photo before disconnecting anything so you remember where each wire goes.
- Test the new alternator: Start the engine and check that the battery light is off and voltage reads above 13.5 volts.
- Hyundai Elantras are DIY-friendly: The engine bay is accessible and the alternator is easy to reach.
📑 Table of Contents
- Understanding Your 2013 Hyundai Elantra Alternator
- Tools and Parts You Will Need
- Step-by-Step Alternator Replacement Guide
- Testing Your New Alternator
- Common Mistakes to Avoid
- Why the 2013 Hyundai Elantra Is Great for DIY Repairs
- When to Seek Professional Help
- Maintenance Tips to Extend Alternator Life
- Final Thoughts
Understanding Your 2013 Hyundai Elantra Alternator
The alternator is a small but mighty part of your car. It converts mechanical energy into electrical energy. Every time your engine runs, the alternator keeps the battery charged. It also powers all the electrical systems in your vehicle. Without a working alternator, your car would run on battery power alone and die within minutes.
How the Alternator Works in the Elantra
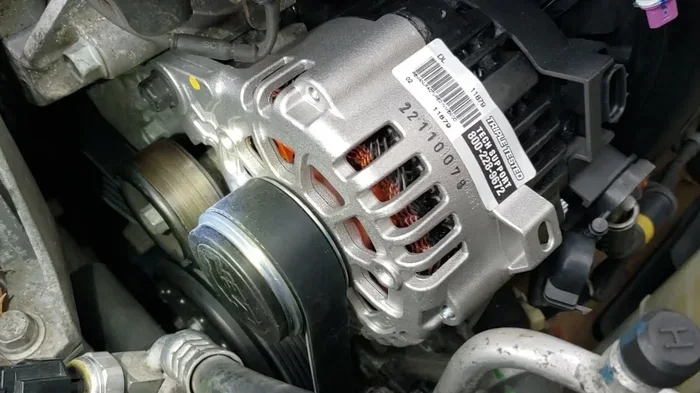
The alternator sits near the front of the engine. It connects to the crankshaft through a serpentine belt. As the engine turns, the belt spins the alternator pulley. Inside the alternator, a rotor spins inside a stator. This creates an electrical current. That current flows through the wiring harness to the battery and electrical system.
The voltage regulator controls the output. It makes sure the alternator sends the right amount of voltage. Too much voltage can damage electronics. Too little means the battery will not charge properly. In the 2013 Hyundai Elantra, the alternator is a single-wire design. This makes it simpler to replace than older models.
Common Signs of a Failing Alternator
How do you know the alternator is going bad? Watch for these warning signs:
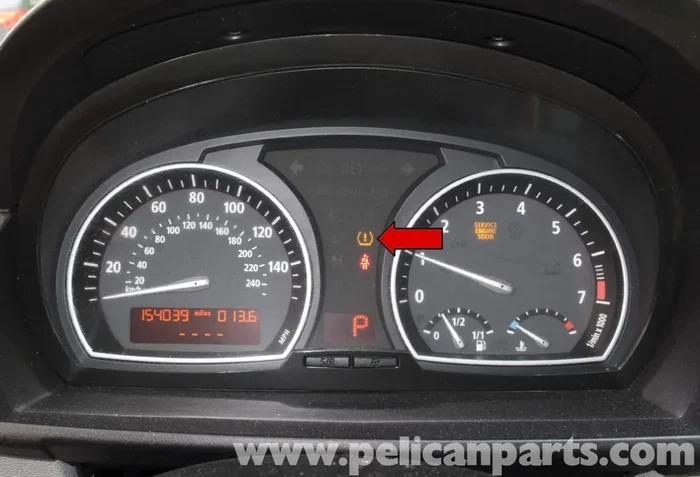
- Battery warning light on the dashboard: This is the most common sign. The light looks like a battery icon.
- Dim or flickering headlights: If your lights get dim when you idle, the alternator may not be producing enough power.
- Dead or weak battery: A bad alternator cannot recharge the battery. You may find yourself with a car that will not start.
- Electrical issues: Power windows slow down. The radio cuts out. The AC blows weak air.
- Strange noises: A whining or grinding sound from the engine bay can mean a worn alternator bearing.
- Battery light comes on and off: Intermittent warning lights often mean the alternator is failing gradually.
If you notice any of these symptoms, do not ignore them. A completely dead alternator will leave you stranded. It is better to fix it early. And the good news is that a 2013 Hyundai Elantra alternator is not expensive. A new unit costs between 150 and 300 dollars depending on the brand.
Tools and Parts You Will Need
Before you start, gather everything you need. There is nothing worse than halfway through a repair and realizing you are missing a tool. Here is your complete shopping and preparation list.
Parts List
- New alternator: Make sure it fits the 2013 Hyundai Elantra. Check the part number against your owner’s manual.
- Serpentine belt: Inspect your current belt. If it is cracked or worn, replace it at the same time.
- Dielectric grease: This protects electrical connections from moisture and corrosion.
Tools You Need
- Socket set (10mm, 12mm, 13mm, 14mm, 15mm are the most common sizes)
- Ratchet and extensions
- Serpentine belt tensioner tool
- Wrench set
- Multimeter or voltage tester
- Safety glasses and gloves
- Camera or phone (to photograph wiring before disconnecting)
- Jack and jack stands or ramps (if needed for access)
- Pen and paper (to label wires if needed)
You can find all these tools at any auto parts store. If you do not own a serpentine belt tool, most parts stores will lend you one for free. That is a nice perk of being a regular customer.
One important tip: buy a quality alternator. Cheap alternators fail quickly. Brands like Denso, Bosch, and Remy are reliable choices for the Hyundai Elantra. Spending a little more upfront saves you from doing this job twice.
Step-by-Step Alternator Replacement Guide
Now let us get into the actual work. Follow these steps carefully and you will have a new alternator in under an hour.
Step 1: Prepare the Vehicle
First, park your Elantra on a flat surface. Turn off the engine and let it cool. Pop the hood and locate the battery. Using a wrench, loosen the negative terminal first. Then remove it from the battery post. This prevents any electrical shorts while you work. Always disconnect the negative cable first. It is the safest practice for any electrical repair.
Take a moment to look at the engine bay. Familiarize yourself with the alternator location. On the 2013 Hyundai Elantra, the alternator sits on the front of the engine, toward the passenger side. The serpentine belt wraps around several components including the alternator pulley.
Step 2: Document the Wiring
Before you disconnect anything, take clear photos of the wiring. The alternator has a main power wire and possibly a smaller plug. Use your phone to photograph every connection. This makes reinstallation much easier. Trust me, you will thank yourself later.
If there are any zip ties or clips holding the wiring harness in place, note where they are. You want everything to go back exactly as it was.
Step 3: Release the Serpentine Belt
This is the step most people find the most intimidating. But it is actually quite simple. Locate the serpentine belt tensioner. It is a small pulley with a spring-loaded arm. Insert your serpentine belt tool into the square hole on the tensioner pulley.
Rotate the tensioner toward the front of the engine. This releases the tension on the belt. While holding it, slide the belt off the alternator pulley. Then slowly release the tensioner. The belt will stay in place on the other components.
Take a photo of the belt routing before you remove it completely. You need to know exactly how the belt wraps around each pulley when installing the new one.
Step 4: Remove the Old Alternator
Now it is time to remove the alternator. There are typically two mounting bolts holding it in place. Use the appropriate socket size for your bolts. One bolt is usually at the front of the alternator. The other is at the back or bottom.
Once both bolts are out, you may need to wiggle the alternator slightly to free it. Be careful not to damage the surrounding components. The alternator on the 2013 Hyundai Elantra is not overly tight, so it should come out with moderate effort.
Disconnect the main power wire from the back of the alternator. There may be a bolt holding the wire terminal. Remove that bolt and set it aside. You will reuse it on the new alternator. Also disconnect any smaller electrical plugs.
Step 5: Install the New Alternator
Now for the exciting part — putting the new alternator in. Position the new unit where the old one came out. You might need to rotate it slightly to align the mounting holes with the bolt holes.
Start by threading the main power wire back onto the new alternator. Tighten the terminal bolt securely. Then install the mounting bolts. Hand-tighten them first to make sure everything aligns properly. Once you are satisfied, tighten the bolts with your ratchet.
Do not overtighten the bolts. The alternator bracket on the Elantra can strip easily. snug is good. Gorilla tight is not.
Step 6: Reinstall the Serpentine Belt
With the new alternator in place, it is time to put the belt back on. Route the serpentine belt exactly as it was before. Follow the routing diagram you photographed earlier. Start by threading the belt around all the pulleys except the tensioner.
Then use your serpentine belt tool again to rotate the tensioner. Slide the belt onto the alternator pulley last. Slowly release the tensioner. The belt should now be snug around all the pulleys.
Double-check the belt routing. Make sure it is seated properly on every pulley. A misrouted belt will cause noise and poor performance.
Step 7: Reconnect the Electrical Connections
Now reconnect all the electrical wires to the new alternator. Refer to your photos from earlier. Push each connector firmly until it clicks into place. Apply a small amount of dielectric grease to the connections. This protects them from moisture and ensures good electrical contact.
If the alternator has a main power wire with a bolt terminal, tighten it down firmly. A loose connection here can cause charging problems.
Step 8: Reconnect the Battery
Go back to the battery. Connect the positive terminal first and tighten it. Then connect the negative terminal and tighten it. Make sure both connections are snug. A loose battery terminal can cause all sorts of electrical gremlins.
Before you start the engine, do a quick visual inspection. Look for any wires that might be pinched or caught. Make sure the serpentine belt is properly seated. Everything should look clean and organized.
Testing Your New Alternator
Now comes the moment of truth. Start the engine and listen carefully. You should hear a smooth idle with no strange noises. If you hear grinding or whining, stop immediately and check the belt routing.
Using a Multimeter to Test Voltage
Set your multimeter to DC voltage. Touch the red probe to the positive battery terminal and the black probe to the negative terminal. With the engine off, you should read around 12.6 volts. Now start the engine. The voltage should jump to between 13.5 and 14.5 volts.
This reading tells you the alternator is charging properly. If the voltage stays below 13 volts, something is wrong. Check the connections first. If everything looks good, the new alternator might be defective.
Checking for Warning Lights
Look at your dashboard. The battery warning light should be off. If it stays on, there is an issue. Common causes include a loose wire connection or an incorrectly routed serpentine belt. Double-check your work and try again.
If the light goes off and your voltage reads correctly, congratulations. You just replaced the alternator on your 2013 Hyundai Elantra. That is a real accomplishment.
Common Mistakes to Avoid
Even with clear instructions, mistakes happen. Here are the most common errors people make when replacing an alternator:
- Forgetting to disconnect the battery: This can cause electrical shorts and damage the new alternator. Always disconnect the negative terminal first.
- Not photographing the wiring: When you are working in a tight engine bay, it is easy to forget where wires go. Take photos before disconnecting anything.
- Using the wrong serpentine belt: The wrong belt length or type will cause it to slip or make noise. Always verify the belt part number.
- Overtightening bolts: The alternator bracket on the Elantra is made of aluminum. It strips easily. Hand-tighten and then snug with the ratchet.
- Ignoring the serpentine belt tensioner: A weak tensioner will cause the belt to slip. If your tensioner feels loose or makes noise, replace it at the same time.
- Skipping the voltage test: Never assume the new alternator works. Always test it with a multimeter before closing the hood.
Why the 2013 Hyundai Elantra Is Great for DIY Repairs
One thing that makes the Elantra special is how easy it is to work on. Unlike some cars where the engine bay is a cramped maze, the Elantra gives you plenty of room to maneuver. The alternator is right at the top of the engine, easy to reach without removing any other components.
Many car owners worry about working on their own vehicles. But the truth is, most people underestimate their abilities. The 2013 Hyundai Elantra is one of the most straightforward cars to repair yourself. You do not need specialized tools or years of experience. Just patience, the right instructions, and a willingness to learn.
Doing your own car maintenance also gives you a deeper understanding of your vehicle. You will know exactly what is under the hood. When something goes wrong next time, you will already have the knowledge to handle it. That confidence is worth more than any savings.
And let us be honest. There is a real sense of satisfaction when you fix something yourself. You saved money. You learned a new skill. And your car is running better because of it. That is a win-win-win.
When to Seek Professional Help
Most alternator replacements go smoothly for DIYers. But there are times when it makes sense to visit a professional. If the serpentine belt tensioner is seized and you cannot rotate it, a mechanic has the right tools to handle it. If the alternator mounting bolts are rusted or stripped, a shop can extract them safely.
Also, if you test the new alternator and the battery light still comes on, there might be an underlying electrical issue. A damaged wiring harness or a faulty voltage regulator could be the real problem. In these cases, professional diagnostics save time and prevent further damage.
Remember, there is no shame in asking for help. Even experienced mechanics take cars to specialists for complex electrical issues. The goal is to get your Elantra running right.
Maintenance Tips to Extend Alternator Life
Your new alternator should last a long time. But proper maintenance helps it reach its full lifespan. Here are some tips:
- Check the serpentine belt regularly: Look for cracks, fraying, or glazing. A worn belt puts extra strain on the alternator.
- Keep the battery terminals clean: Corroded terminals make the alternator work harder. Clean them with a wire brush every few months.
- Listen for unusual noises: A new whining or grinding sound could mean the alternator bearing is wearing out.
- Avoid overloading the electrical system: Adding too many aftermarket electronics can strain the alternator beyond its design limits.
- Get regular inspections: During oil changes, ask the technician to check the charging system voltage.
Taking care of the small things prevents big problems. Your alternator works hard every time you start the engine. A little attention goes a long way.
Final Thoughts
Replacing the alternator on a 2013 Hyundai Elantra is a rewarding repair that anyone can do. You save money, learn valuable skills, and keep your car on the road. With the right tools, clear instructions, and a little patience, you can complete this job in under an hour.
Remember to take your time. Do not rush through any step. If something does not fit or feel right, stop and double-check. The wiring connections must be secure. The serpentine belt must be properly routed. And always test the new alternator before closing the hood.
Your Elantra will thank you with reliable starts and steady charging for years to come. Now go get that job done and enjoy the satisfaction of a repair well done.
Frequently Asked Questions
How much does it cost to replace an alternator on a 2013 Hyundai Elantra?
The alternator part itself costs between 150 and 300 dollars. If you go to a mechanic, add 100 to 200 dollars for labor. Doing it yourself saves you the labor cost entirely. The total DIY cost is usually around 200 to 350 dollars depending on the brand you choose.
How long does it take to replace the alternator on a 2013 Hyundai Elantra?
Most DIYers complete the job in 45 minutes to an hour. If you are new to car repairs, give yourself two hours to be safe. The process is straightforward and does not require removing any major components.
Can I drive my 2013 Hyundai Elantra with a bad alternator?
You can drive short distances on battery power alone, but it is risky. Once the battery dies, your car will stall and will not restart. If the battery warning light comes on, get the alternator checked or replaced as soon as possible. If you need to jumpstart the car, that is only a temporary solution until you fix the alternator.
What causes an alternator to fail on a Hyundai Elantra?
The most common causes are worn serpentine belts, bad voltage regulators, and age-related bearing wear. Electrical overload from aftermarket accessories can also shorten alternator life. Keeping the belt in good condition helps the alternator last longer.
Do I need to replace the serpentine belt when I replace the alternator?
Not always, but it is a good idea. If the belt shows any signs of cracking, glazing, or fraying, replace it at the same time. A new alternator paired with an old worn belt can cause premature failure. It is a small investment that protects your repair.
What is the difference between an alternator and a generator?
Modern cars like the 2013 Hyundai Elantra use alternators, not generators. An alternator produces alternating current (AC) and converts it to direct current (DC) for the battery. Generators produce direct current directly but are heavier and less efficient. All newer vehicles use alternators because they are lighter, more reliable, and charge better at low engine speeds.