Homemade Car Windshield Cleaners for a Crystal Clear View
Homemade car windshield cleaners are a simple, affordable way to keep your glass spotless and streak-free. You can make effective cleaners using common household ingredients like vinegar, rubbing alcohol, and dish soap. This guide covers easy recipes, step-by-step tips, and expert advice so you can enjoy a crystal clear view every time you drive.
There is nothing worse than hitting the road with a dirty windshield. Every glare, every raindrop, every smear of road grime makes driving harder and more dangerous. You deserve a homemade car windshield cleaner that actually works without breaking the bank.
Making your own DIY windshield cleaner is easier than you think. With a few simple ingredients from your kitchen or garage, you can create a powerful glass cleaning solution that delivers a streak-free shine. This guide walks you through everything you need to know. We will cover recipes, tools, tips, and common mistakes so you can keep your car glass looking brand new all year long.
Key Takeaways
- Easy DIY Recipes: Learn how to make powerful windshield cleaners with vinegar, rubbing alcohol, and dish soap using items you already have at home.
- Safe and Affordable: Homemade cleaners save money and avoid harsh chemicals found in many commercial products.
- Streak-Free Results: Follow our tips for a perfect streak-free shine every time you clean your car glass.
- Year-Round Use: Different recipes work best for different seasons, from summer bug splatter to winter ice buildup.
- Quick Application: Most homemade cleaners take less than five minutes to prepare and apply.
- Eco-Friendly Option: DIY cleaners reduce plastic waste and harmful chemical runoff.
📑 Table of Contents
- Why Choose Homemade Car Windshield Cleaners?
- Best Homemade Car Windshield Cleaner Recipes
- Tools You Need for the Best Results
- How to Apply Homemade Windshield Cleaner Like a Pro
- Common Mistakes to Avoid
- Seasonal Cleaning Guide for Your Windshield
- Expert Insights on Car Windshield Maintenance
- Key Takeaways
- Conclusion
Why Choose Homemade Car Windshield Cleaners?
Store-bought cleaners can be expensive. Many contain harsh chemicals that harm your car’s finish and the environment. A homemade car windshield cleaner gives you full control over what goes on your glass. You save money, reduce waste, and get excellent results.
Here are some key reasons to switch to DIY windshield cleaner recipes:
- Cost Savings: A single batch costs less than a dollar compared to $5-$10 for commercial brands.
- Safe Ingredients: You avoid ammonia, parabens, and synthetic fragrances that can irritate your skin and lungs.
- Custom Formulas: Adjust the recipe based on your climate, season, and specific cleaning needs.
- Eco-Friendly: Natural ingredients break down safely and reduce chemical runoff into waterways.
- Always Available: You probably already have the ingredients at home right now.
What Makes a Great Windshield Cleaner?
A good auto glass cleaner needs to dissolve grease, remove water spots, and cut through bug splatter without leaving streaks. The best homemade glass cleaner balances cleaning power with gentleness. You want something strong enough to handle tough grime but safe for your car’s glass and rubber seals.
Most effective DIY cleaners use three basic types of ingredients:
- An active cleaning agent: This breaks down dirt and grease. White vinegar and dish soap are the most popular choices.
- A solvent: This helps the solution evaporate quickly, reducing streaks. Rubbing alcohol and distilled water work great.
- An optional additive: Things like essential oils can add a pleasant scent or boost cleaning power.
Best Homemade Car Windshield Cleaner Recipes
Here are some of the most effective DIY windshield cleaner recipes you can make right now. Each one targets a different cleaning challenge, so pick the one that fits your needs best.
Recipe 1: The Classic Vinegar Cleaner
This is the most popular homemade car windshield cleaner recipe for good reason. White vinegar is a natural acid that dissolves mineral deposits, water spots, and light grime effortlessly.
Ingredients:
- 1 cup distilled water
- 1 cup white vinegar
- 1 tablespoon cornstarch (optional, for extra shine)
Instructions:
- Mix the distilled water and white vinegar in a clean spray bottle.
- If you want extra shine, add cornstarch and shake well until dissolved.
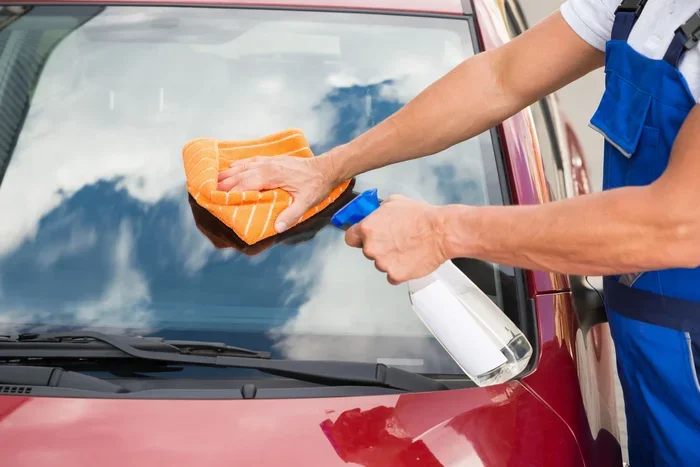
- Spray onto the windshield and wipe with a microfiber cloth.
- Buff dry with a second clean cloth for a streak-free finish.
This recipe works beautifully for regular maintenance cleaning. It removes light dust, rain spots, and fingerprints in seconds. The vinegar glass cleaner base is also great for cleaning your side windows and rear glass.
Recipe 2: The Heavy-Duty Alcohol Cleaner
For tough grime, bug splatter, and stubborn road tar, this auto glass cleaner recipe is your best friend. Rubbing alcohol dissolves grease and adhesive residue like nothing else.
Ingredients:
- 1 cup distilled water
- 1 cup isopropyl alcohol (70% or higher)
- 1 tablespoon dish soap (clear preferred)
Instructions:
- Combine the distilled water and isopropyl alcohol in a spray bottle.
- Add one tablespoon of clear dish soap.
- Shake gently to mix. Do not create too many bubbles.
- Spray on the windshield and wipe with a microfiber towel.
This homemade glass cleaner is perfect for spring and summer when bugs and road grime build up fast. The alcohol evaporates quickly, which means fewer streaks and a faster drying time.
Recipe 3: The Winter Ice Remover
Cold weather brings frost, ice, and frozen condensation. This DIY windshield cleaner formula helps you de-ice your windshield safely without damaging the glass.
Ingredients:
- 2 cups isopropyl alcohol (70% or higher)
- 1 cup distilled water
- 2 tablespoons white vinegar
Instructions:
- Mix the alcohol and distilled water in a spray bottle.
- Add the white vinegar and shake well.
- Spray generously onto the frozen windshield.
- The ice will begin melting within seconds. Use an ice scraper for remaining buildup.
The high alcohol content lowers the freezing point, which prevents the solution from freezing itself. Keep a bottle in your trunk during winter months. This is one of the most practical car cleaning tips for anyone who lives in a cold climate.
Tools You Need for the Best Results
Having the right tools makes all the difference when you use a homemade car windshield cleaner. The formula matters, but how you apply it matters just as much.
Microfiber Cloths
A microfiber cloth is the single most important tool for streak-free cleaning. Unlike paper towels or old rags, microfiber has tiny fibers that trap dirt and absorb liquid without leaving lint behind. Always use a clean, soft microfiber cloth for both spraying and buffing.
Keep at least two cloths handy. One cloth applies the cleaner, and the other dries and buffs the surface. Using the same cloth for both steps can reintroduce grime and create streaks.
Spray Bottles
Use a clean spray bottle with a fine mist setting. A coarse spray wastes product and creates drips. Glass spray bottles work best because they do not react with the cleaning ingredients. Avoid bottles that previously held harsh chemicals, as residue can contaminate your glass cleaning solution.
Distilled Water
Always use distilled water in your DIY windshield cleaner. Tap water contains minerals that leave spots and residue on glass. Over time, these mineral deposits build up and create stubborn water spots that are hard to remove. Distilled water is cheap and available at any grocery store.
Squeegees
A good squeegee is a game-changer for large windshield surfaces. It spreads the cleaner evenly and removes excess liquid in one pass. Look for a squeegee with a soft rubber blade to avoid scratching the glass.
How to Apply Homemade Windshield Cleaner Like a Pro
Even the best homemade car windshield cleaner will underperform if you apply it incorrectly. Follow these steps for professional-level results every time.
Step 1: Prep the Surface
Before you spray anything, remove loose dirt and debris from the windshield. Use a dry microfiber cloth to gently wipe away dust and leaves. Spraying cleaner on a dirty surface can cause scratching. If there is heavy mud or dried bug residue, rinse with plain water first.
Step 2: Spray Evenly
Hold the spray bottle about six inches from the glass. Spray in a sweeping motion, covering the entire windshield in a light, even layer. Do not soak the glass. A thin, consistent layer works better than a heavy drench.
Step 3: Wipe in Circular Motions
Use a clean microfiber cloth and wipe the glass in circular motions. Start from the top and work your way down. Circular motions help lift dirt and prevent swirl marks. Apply gentle pressure. Let the cleaner do the heavy lifting.
Step 4: Buff Dry
After wiping, immediately switch to a second dry microfiber cloth. Buff the glass in straight vertical or horizontal strokes. This final pass removes any remaining moisture and ensures a streak-free shine. The key is to never let the cleaner air dry on the glass.
Quick Tips for Streak-Free Results
- Clean in the shade: Direct sunlight causes the cleaner to dry too fast, leaving streaks.
- Wipe both sides: Clean the inside of the windshield too. Oils from the dashboard and air vents build up and cause glare at night.
- Reapply often: A quick wipe-down once a week keeps buildup from becoming a big problem.
- Use fresh cloths: Dirty cloths scratch glass and spread grime instead of removing it.
- Dry the edges: Water often pools around the windshield edges and frame. Wipe these areas thoroughly to prevent water spots.
Common Mistakes to Avoid
Even experienced DIYers make mistakes when using a homemade car windshield cleaner. Here are the most common errors and how to avoid them.
Using Tap Water Instead of Distilled Water
Tap water contains calcium and magnesium minerals. These leave white spots on glass that are difficult to remove. Always choose distilled water for your DIY windshield cleaner. It costs very little and makes a huge difference in the final result.
Using Too Much Dish Soap
A little dish soap goes a long way. Too much creates excess suds that are hard to rinse off and leave a soapy film on the glass. Stick to one tablespoon per cup of liquid. If you notice streaks after cleaning, reduce the amount of soap in your next batch.
Skipping the Microfiber Cloth
Paper towels and regular rags leave behind fibers and lint. They can also scratch glass if they contain trapped dirt particles. A quality microfiber cloth is the only safe and effective choice for cleaning automotive glass.
Cleaning in Direct Sunlight
Sunlight heats the glass and causes the cleaner to evaporate too quickly. This leaves behind residue and streaks. Always find a shaded spot or clean your car in the early morning or late evening.
Ignoring the Inside Surface
Most people only clean the outside of their windshield. The inside surface collects oils, dust, and fumes from the dashboard and air conditioning. This film causes dangerous glare, especially at night and during low-light conditions. Clean both sides for the best visibility.
Seasonal Cleaning Guide for Your Windshield
Different seasons bring different challenges for your car glass. Adjusting your auto glass cleaner routine throughout the year keeps your windshield in top condition.
Spring: Pollen and Bug Season
Spring brings pollen, insects, and road tar. Use the heavy-duty alcohol cleaner recipe to dissolve bug splatter and adhesive residue. Rinse your windshield after long drives on highways where bug splatter accumulates quickly.
Summer: UV Damage and Water Spots
Summer heat causes water to evaporate fast, leaving mineral deposits and water spots. Use the classic vinegar cleaner regularly to prevent buildup. Park in the shade whenever possible to reduce UV damage to your windshield and the rubber seals around it.
Fall: Leaf Stains and Acid Damage
Falling leaves leave tannin stains on glass. Tree sap can also bond to the windshield and cause etching if left too long. Clean up leaf debris and sap promptly with the alcohol-based cleaner. A quick wipe-down after parking under trees prevents permanent damage.
Winter: Ice, Frost, and Salt
Winter weather is the harshest on your windshield. Use the ice remover formula to safely de-ice your glass. After driving through salted roads, rinse your windshield with plain distilled water to remove salt residue. Salt is corrosive and can damage both the glass and the metal frame over time.
Expert Insights on Car Windshield Maintenance
Keeping your windshield clean is about more than just aesthetics. A clear view directly affects your safety on the road. Here are some expert-backed car maintenance tips to keep your glass in excellent condition.
Replace Your Wiper Blades Regularly
Worn wiper blades scratch glass and leave streaks no cleaner can fix. Replace your wiper blades every six to twelve months. If you notice squeaking, skipping, or visible wear on the rubber, it is time for a new set.
Apply a Rain Repellent Treatment
After cleaning your windshield with a homemade car windshield cleaner, consider applying a rain repellent product. These treatments create a hydrophobic barrier that causes water to bead up and roll off the glass. This improves visibility during heavy rain and reduces the need for constant wiper use.
Check Your Windshield for Chips and Cracks
A dirty windshield makes it harder to spot small chips and cracks. Clean your glass thoroughly and inspect it under good light. Small chips can spread into large cracks if left untreated. Address any damage promptly to avoid costly windshield replacement.
Keep Your Washer Fluid Reservoir Full
Your windshield washer fluid works hand in hand with your wiper blades. Low fluid levels mean you cannot wash away debris effectively. Use a quality washer fluid or a diluted version of your homemade cleaner in the reservoir for everyday driving.
Protect Your Windshield From Heat
Prolonged exposure to direct sunlight weakens windshield glass over time. Use a windshield sunshade when parked for extended periods. This also keeps your car cooler and reduces the strain on your air conditioning system.
Key Takeaways
- Easy DIY Recipes: Learn how to make powerful windshield cleaners with vinegar, rubbing alcohol, and dish soap using items you already have at home.
- Safe and Affordable: Homemade cleaners save money and avoid harsh chemicals found in many commercial products.
- Streak-Free Results: Follow our tips for a perfect streak-free shine every time you clean your car glass.
- Year-Round Use: Different recipes work best for different seasons, from summer bug splatter to winter ice buildup.
- Quick Application: Most homemade cleaners take less than five minutes to prepare and apply.
- Eco-Friendly Option: DIY cleaners reduce plastic waste and harmful chemical runoff.
Conclusion
A homemade car windshield cleaner is one of the simplest and most rewarding DIY projects you can tackle. It saves you money, keeps harmful chemicals out of your home, and delivers results that rival or beat any store-bought product. Whether you need a quick daily wipe-down or a heavy-duty solution for bug season, there is a recipe in this guide that fits your needs.
Use the right ingredients, the right tools, and the right technique. Clean your windshield in the shade, always use distilled water, and invest in good microfiber cloths. These small habits make a massive difference in the clarity and longevity of your auto glass.
Take a few minutes this weekend to mix up a batch of your favorite DIY windshield cleaner. Your windshield will thank you with a crystal clear view every time you get behind the wheel. Once you start using homemade cleaners, you will never go back to expensive commercial brands.
Share these car cleaning tips with friends and family. A clean windshield is a safe windshield, and everyone deserves to drive with a perfect view. Start your homemade car windshield cleaner routine today and feel the difference every time you hit the road.
Frequently Asked Questions
Can I use apple cider vinegar instead of white vinegar?
You can, but white vinegar works better for glass cleaning. Apple cider vinegar has a darker color and can leave a slight residue on the windshield. Stick with white distilled vinegar for the clearest results with your homemade car windshield cleaner.
How often should I clean my windshield with a homemade cleaner?
A quick wipe-down once a week is ideal for most drivers. If you drive frequently on highways or in dusty conditions, clean it every three to four days. Regular cleaning prevents buildup and makes each session faster and easier.
Is rubbing alcohol safe for car glass?
Yes, isopropyl alcohol is safe for automotive glass and is actually a key ingredient in many commercial cleaners. It evaporates quickly and leaves no streaks. Just make sure to use a concentration of 70% or higher for the best cleaning power in your DIY windshield cleaner.
Can I use my homemade cleaner on tinted windows?
Most homemade cleaners are safe for tinted windows. However, avoid using any cleaner with ammonia, as it can degrade tint adhesive over time. The vinegar and alcohol recipes in this guide are ammonia-free and tint-safe. Always test on a small hidden area first.
How long does a batch of homemade cleaner last?
A batch stored in a sealed spray bottle lasts about two to three months. Over time, the ingredients can separate or lose effectiveness. Shake well before each use, and make a fresh batch if the solution looks cloudy or smells off.
Will homemade cleaner remove old water spots?
Yes, especially the vinegar-based recipe. White vinegar dissolves mineral deposits that cause water spots. For stubborn spots, spray the vinegar cleaner, let it sit for two to three minutes, and then wipe with a microfiber cloth. Repeat if needed for heavy buildup on your auto glass cleaner surface.